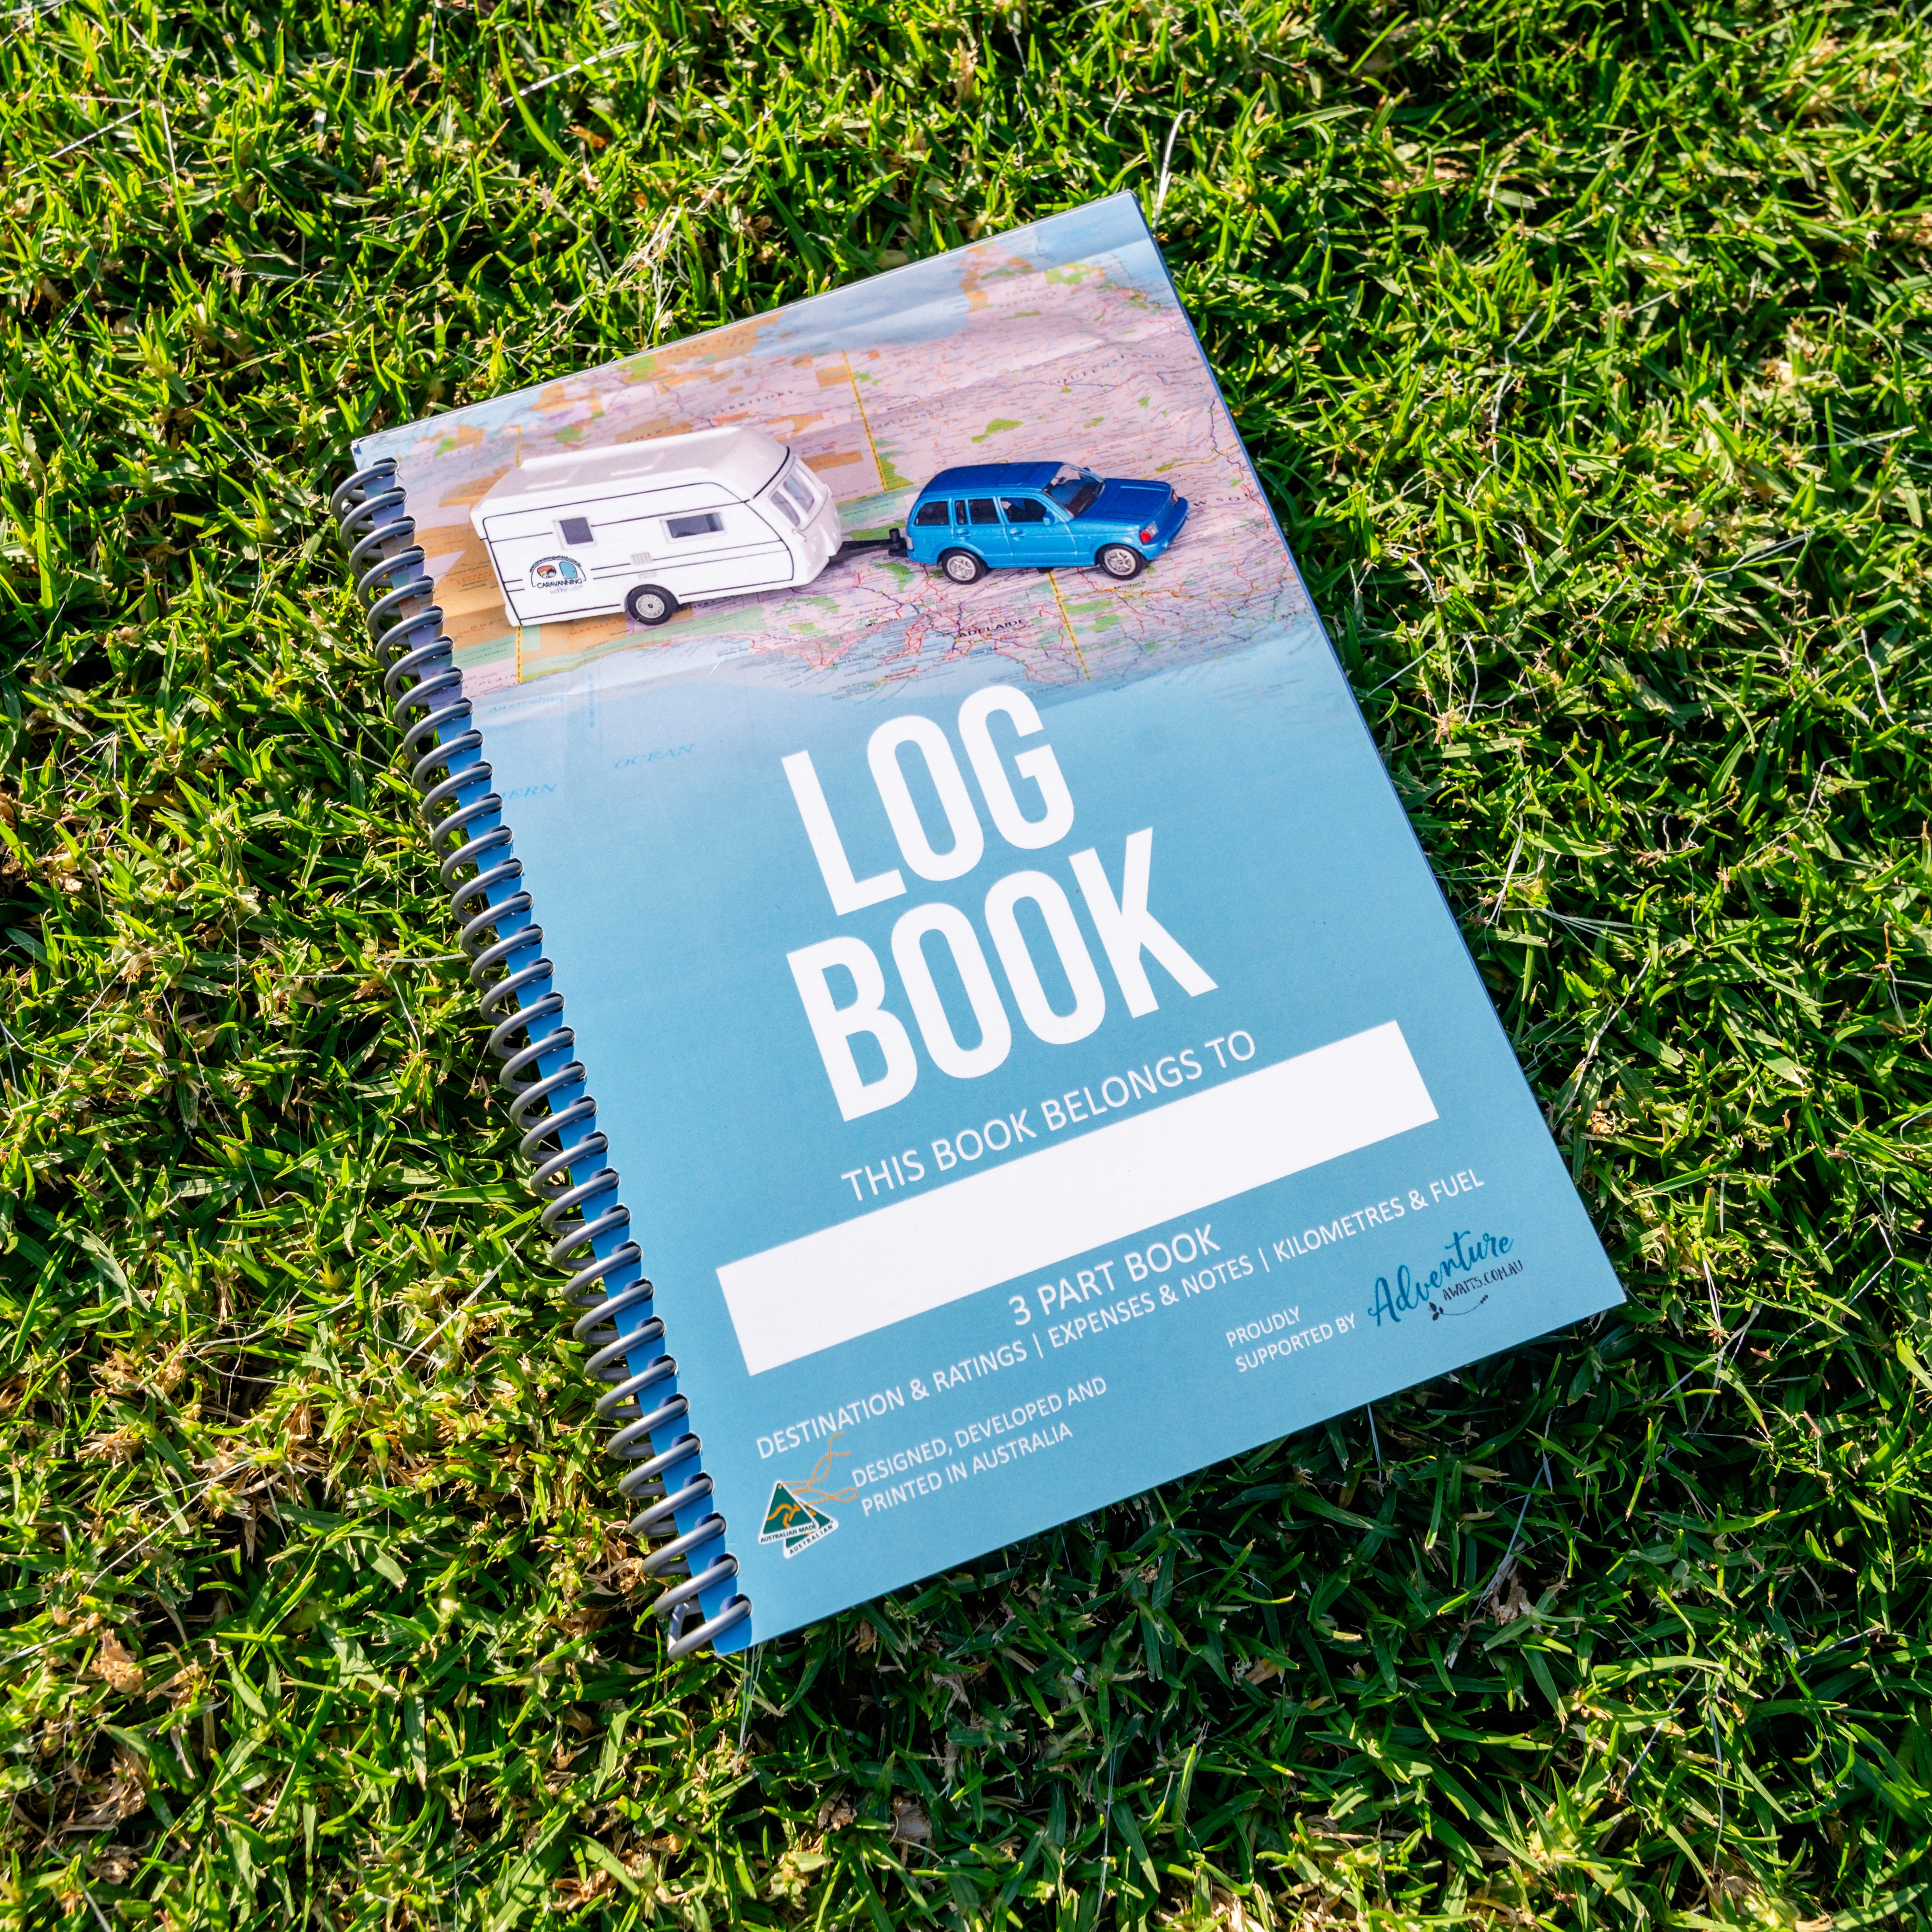
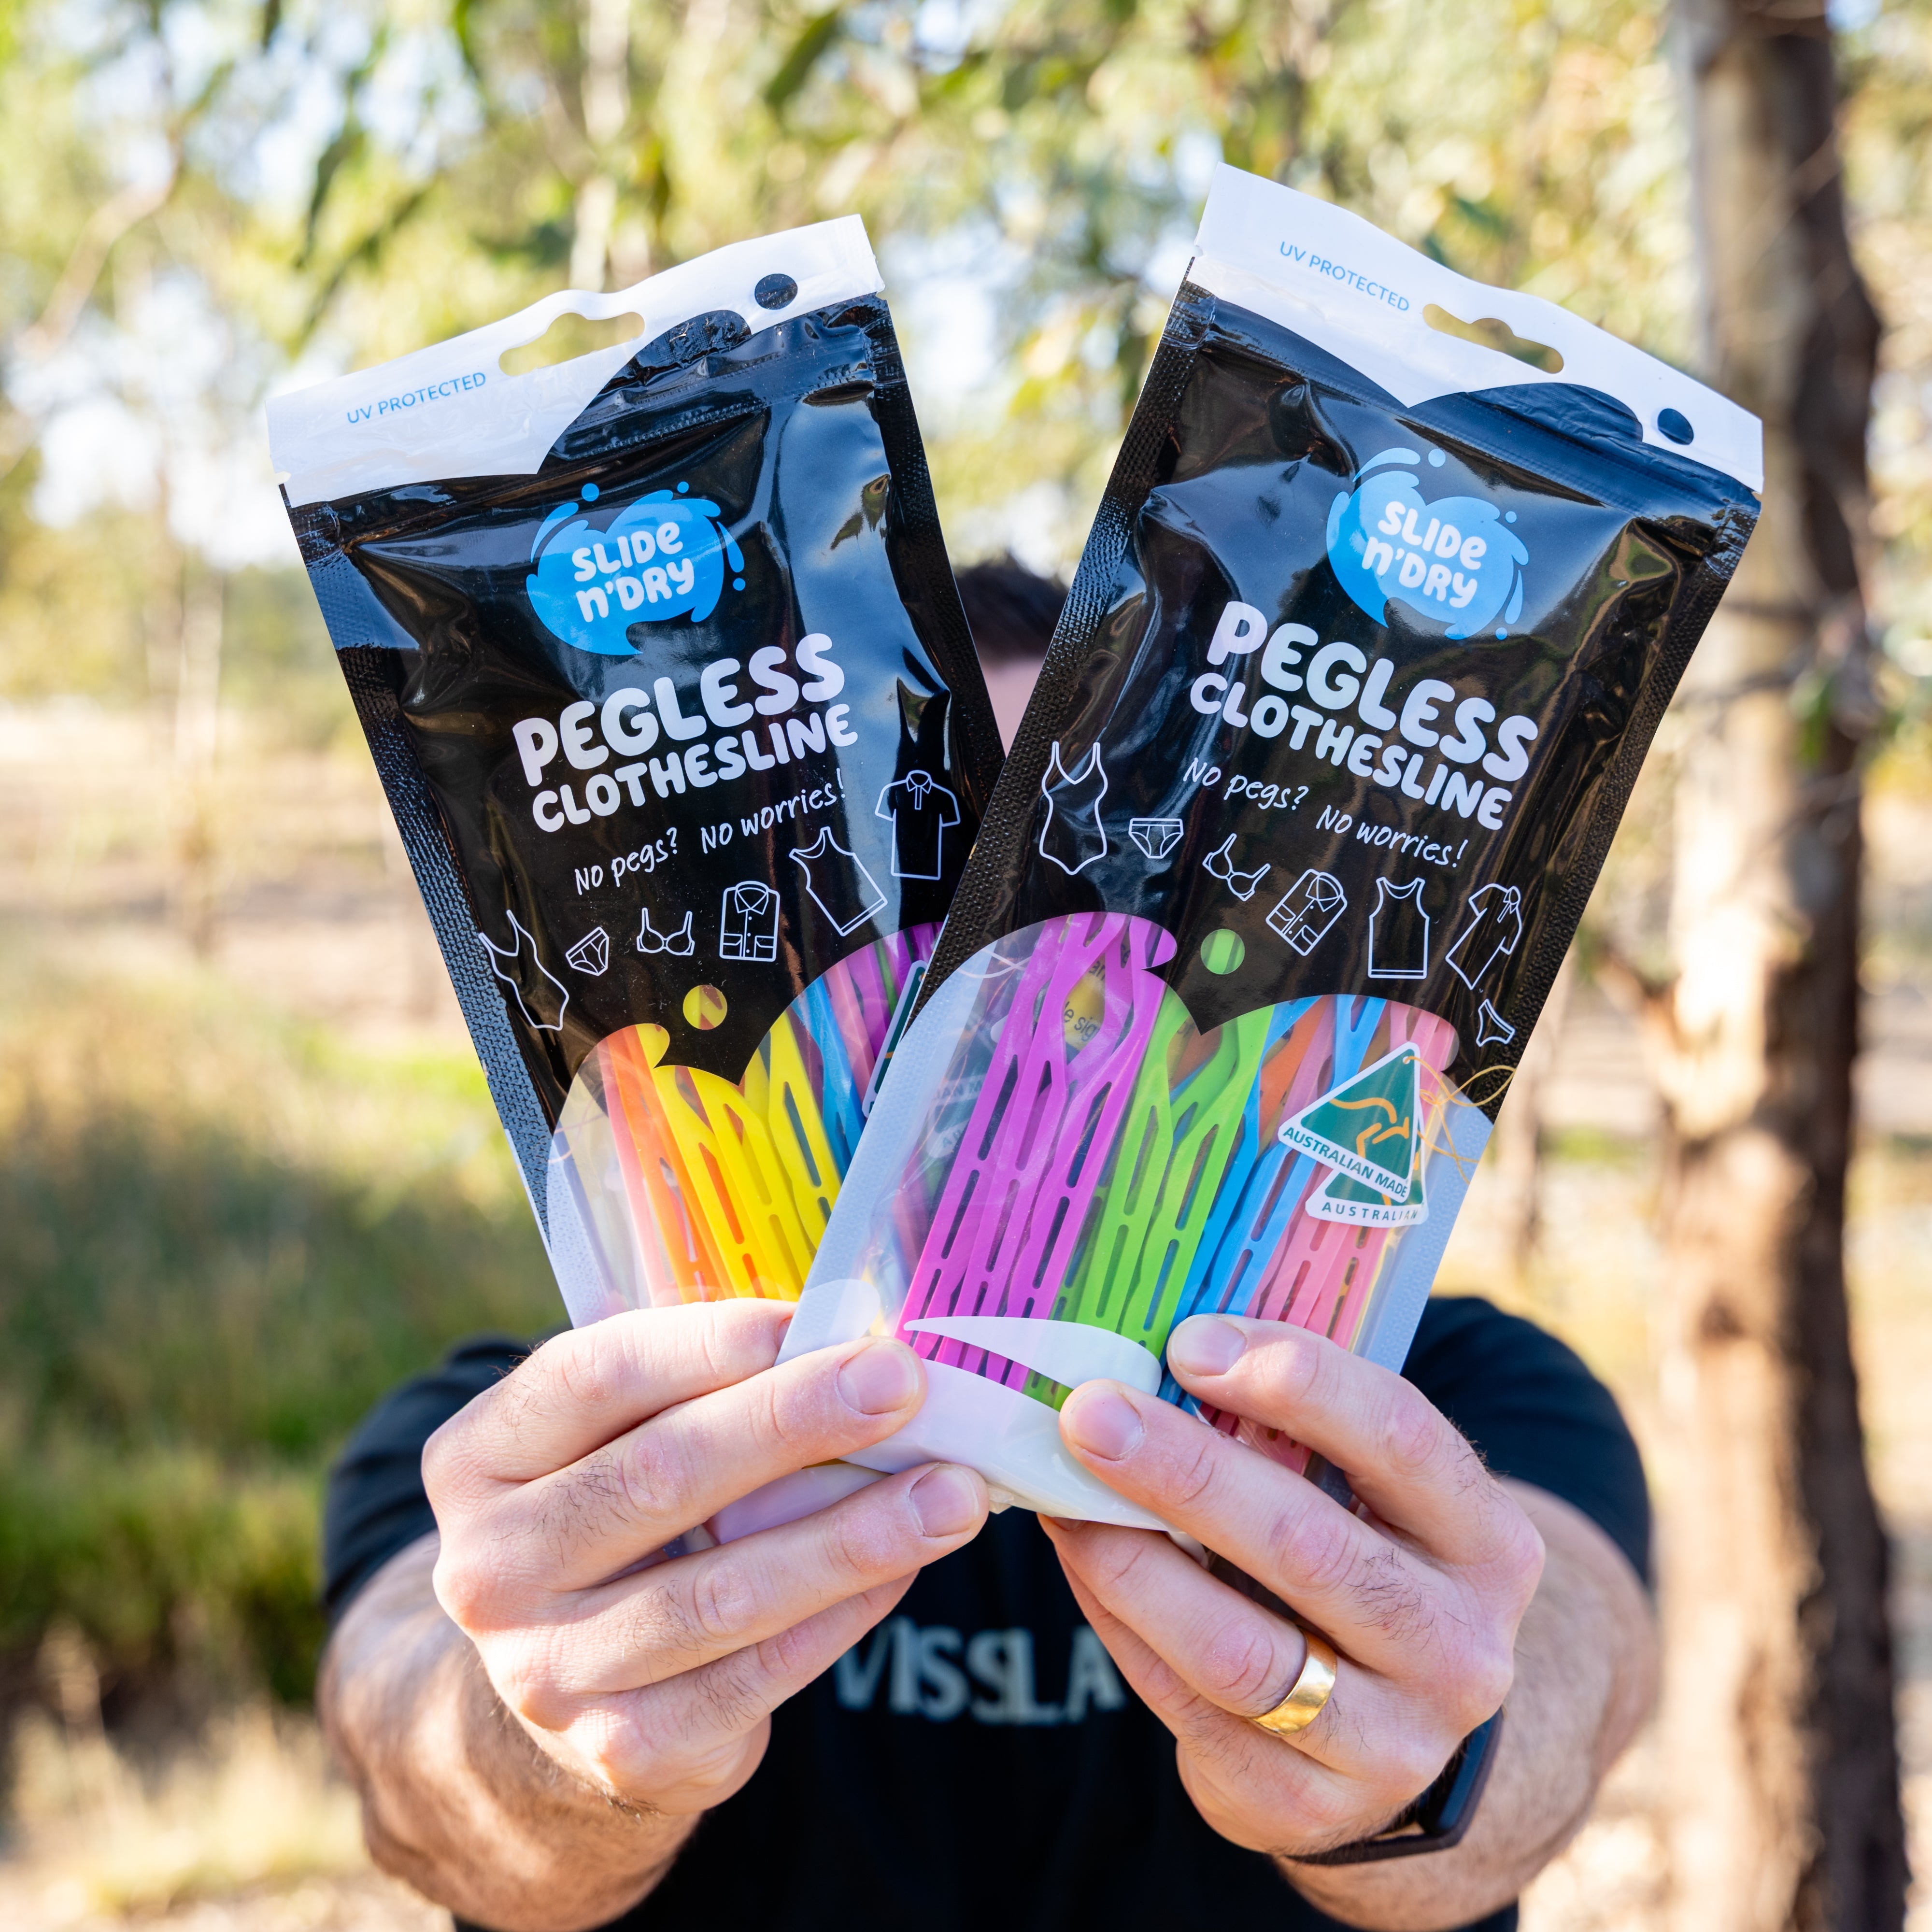
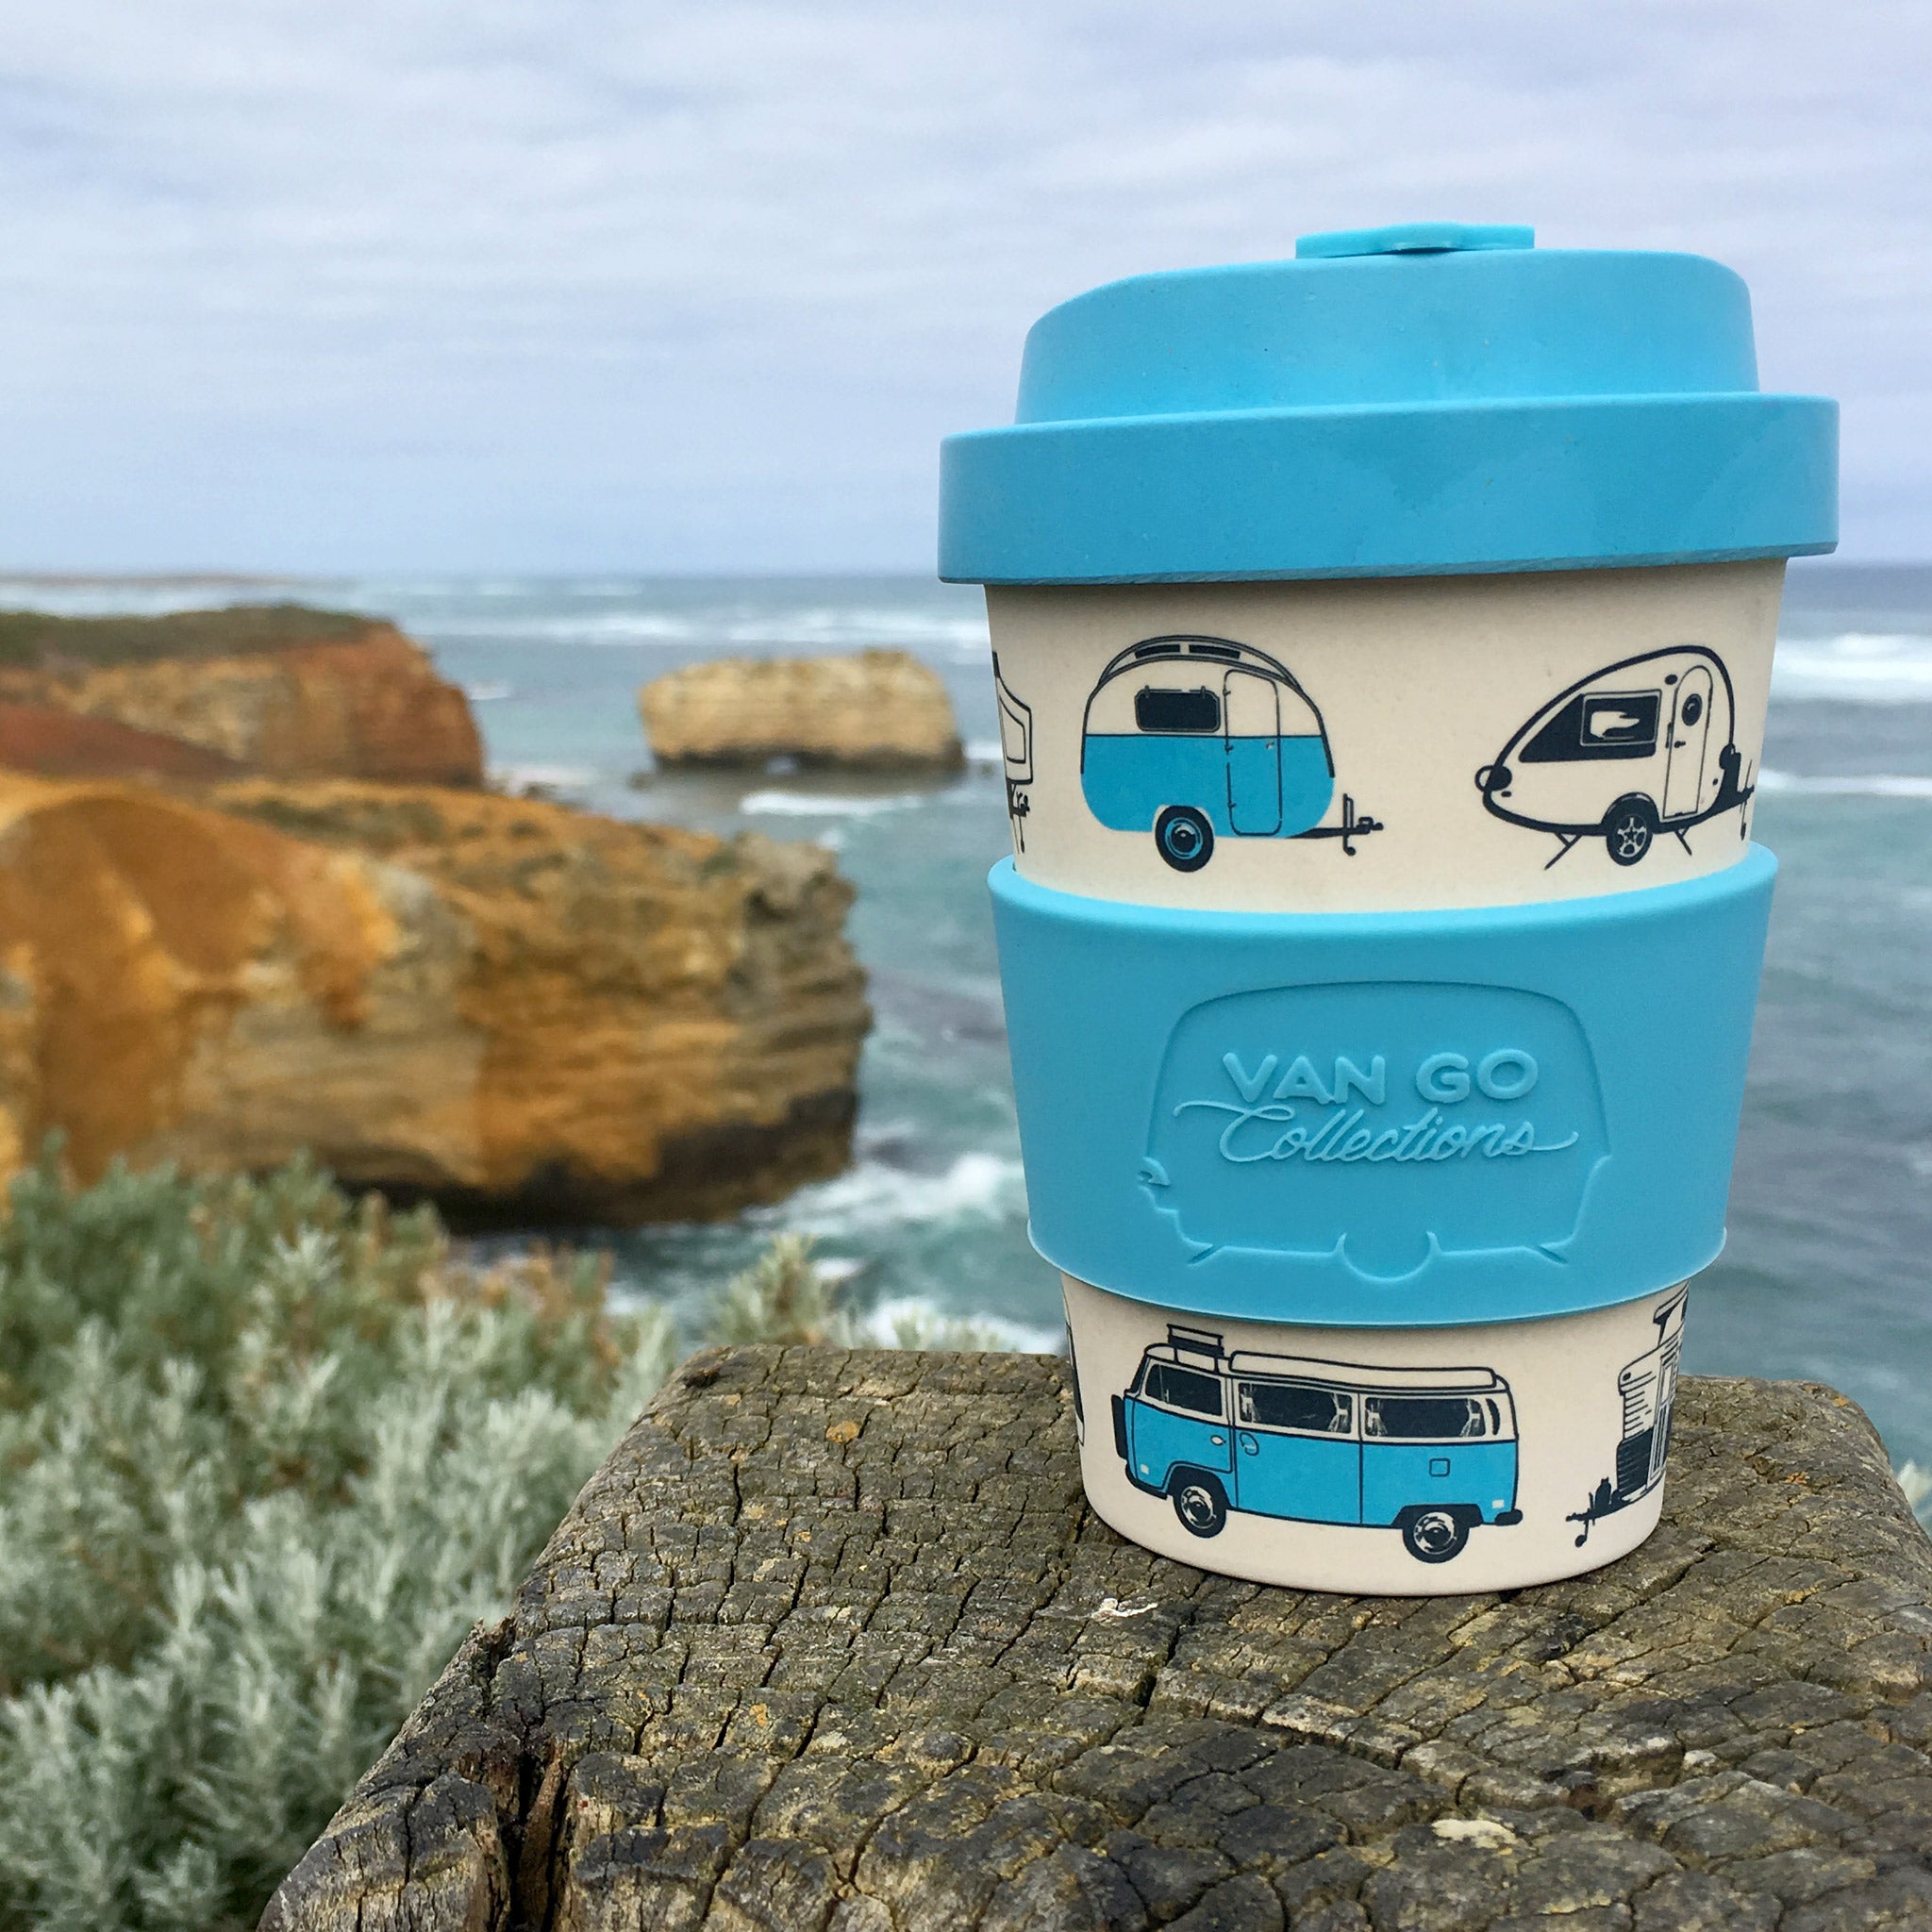
[{"id":198659375259,"handle":"australian-made","updated_at":"2026-06-24T21:10:14+10:00","published_at":"2020-05-31T22:29:12+10:00","sort_order":"manual","template_suffix":"australian-made","published_scope":"global","title":"Australian Made Gifts \u0026 Travel Essentials","body_html":"\u003ch2 data-end=\"473\" data-start=\"405\"\u003eAustralian Made Gifts – Proudly Local, Wonderfully Unique\u003c\/h2\u003e\n\u003cp data-end=\"753\" data-start=\"475\"\u003eAt \u003cstrong data-end=\"498\" data-start=\"478\"\u003eAdventure Awaits\u003c\/strong\u003e, we’re passionate about shining a spotlight on the best of \u003cstrong data-end=\"592\" data-start=\"558\"\u003eAustralian made gifts and gear\u003c\/strong\u003e. Every product in this collection is handpicked for quality, creativity, and practicality - because we know the best adventures start with the right essentials.\u003c\/p\u003e\n\u003cp data-end=\"951\" data-start=\"755\"\u003eWhether you’re \u003cstrong data-end=\"804\" data-start=\"770\"\u003ecaravanning around the Outback\u003c\/strong\u003e, relaxing on the coast, or simply searching for a thoughtful gift, these products are proudly made right here in Australia to last the distance.\u003c\/p\u003e\n\u003ch3 data-end=\"986\" data-start=\"953\"\u003eWhy Choose Australian Made?\u003c\/h3\u003e\n\u003cul data-end=\"1300\" data-start=\"987\"\u003e\n\u003cli data-end=\"1053\" data-start=\"987\"\u003e\n\u003cp data-end=\"1053\" data-start=\"989\"\u003e\u003cstrong data-end=\"1014\" data-start=\"989\"\u003eQuality you can trust\u003c\/strong\u003e – built tough for Aussie conditions.\u003c\/p\u003e\n\u003c\/li\u003e\n\u003cli data-end=\"1132\" data-start=\"1054\"\u003e\n\u003cp data-end=\"1132\" data-start=\"1056\"\u003e\u003cstrong data-end=\"1073\" data-start=\"1056\"\u003eSupport local\u003c\/strong\u003e – every purchase backs small businesses and communities.\u003c\/p\u003e\n\u003c\/li\u003e\n\u003cli data-end=\"1226\" data-start=\"1133\"\u003e\n\u003cp data-end=\"1226\" data-start=\"1135\"\u003e\u003cstrong data-end=\"1158\" data-start=\"1135\"\u003eSustainable choices\u003c\/strong\u003e – eco-friendly materials, ethical production, and smarter design.\u003c\/p\u003e\n\u003c\/li\u003e\n\u003cli data-end=\"1300\" data-start=\"1227\"\u003e\n\u003cp data-end=\"1300\" data-start=\"1229\"\u003e\u003cstrong data-end=\"1248\" data-start=\"1229\"\u003eAuthentic gifts\u003c\/strong\u003e – thoughtful, practical, and uniquely Australian.\u003c\/p\u003e\n\u003c\/li\u003e\n\u003c\/ul\u003e\n\u003ch3 data-end=\"1343\" data-start=\"1302\"\u003eWhat You’ll Find in This Collection\u003c\/h3\u003e\n\u003cul data-end=\"1767\" data-start=\"1344\"\u003e\n\u003cli data-end=\"1464\" data-start=\"1344\"\u003e\n\u003cp data-end=\"1464\" data-start=\"1346\"\u003e\u003cstrong data-end=\"1389\" data-start=\"1346\"\u003eKids Travel Journals \u0026amp; Camper Log Books\u003c\/strong\u003e – Aussie-made, beautifully designed, and loved by over 200,000 families.\u003c\/p\u003e\n\u003c\/li\u003e\n\u003cli data-end=\"1556\" data-start=\"1465\"\u003e\n\u003cp data-end=\"1556\" data-start=\"1467\"\u003e\u003cstrong data-end=\"1496\" data-start=\"1467\"\u003eMap of Australia Stickers\u003c\/strong\u003e – track your adventures across every state and territory.\u003c\/p\u003e\n\u003c\/li\u003e\n\u003cli data-end=\"1663\" data-start=\"1557\"\u003e\n\u003cp data-end=\"1663\" data-start=\"1559\"\u003e\u003cstrong data-end=\"1595\" data-start=\"1559\"\u003eSlide n’ Dry Pegless Clothesline\u003c\/strong\u003e – our award-winning Aussie invention, space-saving and practical.\u003c\/p\u003e\n\u003c\/li\u003e\n\u003cli data-end=\"1767\" data-start=\"1664\"\u003e\n\u003cp data-end=\"1767\" data-start=\"1666\"\u003e\u003cstrong data-end=\"1687\" data-start=\"1666\"\u003eEco-friendly gear\u003c\/strong\u003e – reusable travel products that make life easier (and lighter on the planet).\u003c\/p\u003e\n\u003c\/li\u003e\n\u003c\/ul\u003e\n\u003ch3 data-end=\"1819\" data-start=\"1769\"\u003ePerfect for Gifting \u0026amp; Everyday Adventures 🎁\u003c\/h3\u003e\n\u003cp data-end=\"2045\" data-start=\"1820\"\u003eFrom \u003cstrong data-end=\"1852\" data-start=\"1825\"\u003ebirthdays and Christmas\u003c\/strong\u003e to \u003cstrong data-end=\"1905\" data-start=\"1856\"\u003etravel send-offs and “just because” surprises\u003c\/strong\u003e, Australian made gifts are meaningful, memorable, and always appreciated. They’re not just products - they’re keepsakes that carry a story.\u003c\/p\u003e\n\u003cp data-end=\"2279\" data-start=\"2047\"\u003eAt \u003cstrong data-end=\"2070\" data-start=\"2050\"\u003eAdventure Awaits\u003c\/strong\u003e, we don’t just sell gifts - we live and breathe them. We’re a small, family-run business in \u003cstrong data-end=\"2183\" data-start=\"2161\"\u003eNumurkah, Victoria\u003c\/strong\u003e, and we love helping people find practical products that spark joy and support Aussie makers.\u003c\/p\u003e\n\u003chr data-end=\"2286\" data-start=\"2281\"\u003e\n\u003cp data-end=\"2422\" data-start=\"2288\"\u003e✨ \u003cstrong data-end=\"2420\" data-start=\"2290\"\u003eShop our Australian Made Gifts Collection today - crafted with heart, built for adventure, and shipped Australia-wide with love.\u003c\/strong\u003e\u003c\/p\u003e\n\u003cp\u003eYou can also check out all our products \u0026amp; gift ideas in our \u003ca href=\"https:\/\/www.adventureawaits.com.au\/collections\/australiana-themed\" target=\"_blank\"\u003eAustraliana Themed collection!\u003c\/a\u003e\u003c\/p\u003e","image":{"created_at":"2020-05-31T22:31:51+10:00","alt":null,"width":2000,"height":2000,"src":"\/\/www.adventureawaits.com.au\/cdn\/shop\/collections\/australian_made_products.jpg?v=1737788463"}},{"id":201717448859,"handle":"australiana-gifts-toys","updated_at":"2026-06-25T15:45:01+10:00","published_at":"2020-06-19T11:34:47+10:00","sort_order":"best-selling","template_suffix":"","published_scope":"global","title":"Australiana Gifts \u0026 Toys","body_html":"\u003ch2 data-start=\"150\" data-end=\"209\"\u003e\u003cstrong data-start=\"158\" data-end=\"209\"\u003eAustraliana Gifts \u0026amp; Toys\u003c\/strong\u003e\u003c\/h2\u003e\n\u003cp data-start=\"211\" data-end=\"455\"\u003eLooking for the perfect Aussie-themed gift? You’ve found it! Our \u003cstrong data-start=\"276\" data-end=\"304\"\u003eAustraliana Gifts \u0026amp; Toys\u003c\/strong\u003e collection is one of our all-time favourites - and a big hit with customers wanting to share a little slice of Australia with loved ones near and far.\u003c\/p\u003e\n\u003cp data-start=\"457\" data-end=\"675\"\u003eThis unique range is filled with all things Aussie, from cuddly koalas and kangaroos to native animals, iconic landmarks, bush-inspired books, puzzles, games and locally designed treasures you won’t find anywhere else.\u003c\/p\u003e\n\u003cp data-start=\"677\" data-end=\"910\"\u003eWhether you’re sending a thoughtful gift overseas, putting together an Aussie-themed baby bundle, or shopping for a child who adores wombats, kookaburras or the outback, this collection is packed with heartfelt, high-quality goodies.\u003c\/p\u003e\n\u003cp data-start=\"912\" data-end=\"942\"\u003eOur Australiana collection is:\u003c\/p\u003e\n\u003cul data-start=\"943\" data-end=\"1273\"\u003e\n\u003cli data-start=\"943\" data-end=\"1005\"\u003e\n\u003cp data-start=\"945\" data-end=\"1005\"\u003eFull of unique Australian-made or Aussie-designed products\u003c\/p\u003e\n\u003c\/li\u003e\n\u003cli data-start=\"1006\" data-end=\"1063\"\u003e\n\u003cp data-start=\"1008\" data-end=\"1063\"\u003eIdeal for gifting to international friends and family\u003c\/p\u003e\n\u003c\/li\u003e\n\u003cli data-start=\"1064\" data-end=\"1115\"\u003e\n\u003cp data-start=\"1066\" data-end=\"1115\"\u003eLoved by teachers, travellers, and proud locals\u003c\/p\u003e\n\u003c\/li\u003e\n\u003cli data-start=\"1116\" data-end=\"1187\"\u003e\n\u003cp data-start=\"1118\" data-end=\"1187\"\u003eEducational and fun, with a strong connection to nature and culture\u003c\/p\u003e\n\u003c\/li\u003e\n\u003cli data-start=\"1188\" data-end=\"1273\"\u003e\n\u003cp data-start=\"1190\" data-end=\"1273\"\u003eBeautifully curated for birthdays, baby showers, travel keepsakes or “just because”\u003c\/p\u003e\n\u003c\/li\u003e\n\u003c\/ul\u003e\n\u003cp data-start=\"1275\" data-end=\"1493\"\u003eFrom \u003cstrong data-start=\"1280\" data-end=\"1296\"\u003esensory toys\u003c\/strong\u003e and \u003cstrong data-start=\"1301\" data-end=\"1323\"\u003eeco-friendly gifts\u003c\/strong\u003e to \u003cstrong data-start=\"1327\" data-end=\"1357\"\u003eAussie animal-themed books\u003c\/strong\u003e and souvenirs with heart, this is your go-to range for authentic, meaningful gifts that celebrate Australia in the most delightful way.\u003c\/p\u003e\n\u003cp data-start=\"1495\" data-end=\"1621\"\u003e🛒 \u003cstrong data-start=\"1498\" data-end=\"1560\"\u003eShop Australiana Gifts \u0026amp; Toys online from Adventure Awaits\u003c\/strong\u003e – hand-picked in country Victoria and shared with the world.\u003c\/p\u003e\n\u003cp\u003eYou can also check out our \u003ca href=\"https:\/\/www.adventureawaits.com.au\/collections\/australian-made\" rel=\"noopener noreferrer\" target=\"_blank\"\u003eAustralian MADE collection here...\u003c\/a\u003e\u003c\/p\u003e","image":{"created_at":"2024-08-27T20:05:12+10:00","alt":null,"width":653,"height":653,"src":"\/\/www.adventureawaits.com.au\/cdn\/shop\/collections\/retro_cloth.png?v=1724756051"}},{"id":199904624795,"handle":"caravan-accessories","updated_at":"2026-06-24T21:10:14+10:00","published_at":"2020-06-08T20:43:15+10:00","sort_order":"manual","template_suffix":"","published_scope":"global","title":"Caravan Accessories Australia – Practical \u0026 Unique Caravan Gear","body_html":"\u003ch2 data-end=\"368\" data-start=\"302\"\u003eMust-Have Caravan Accessories for Travelling Australia\u003c\/h2\u003e\n\u003cp data-end=\"633\" data-start=\"392\"\u003eLife on the road is better when you’ve got the right gear. Our Caravan Accessories collection features practical, space-saving and thoughtfully chosen products designed to make caravanning around Australia easier, lighter and more enjoyable.\u003c\/p\u003e\n\u003cp data-end=\"903\" data-start=\"635\"\u003eFrom our Aussie-made bestsellers like the \u003ca rel=\"noopener\" href=\"https:\/\/www.adventureawaits.com.au\/products\/caravan-camper-log-book-australian-made\" target=\"_blank\"\u003e\u003cstrong data-end=\"706\" data-start=\"677\"\u003eCaravan \u0026amp; Camper Log Book\u003c\/strong\u003e\u003c\/a\u003e and\u003ca rel=\"noopener\" href=\"https:\/\/www.adventureawaits.com.au\/products\/slide-n-dry-pegless-clothesline\" target=\"_blank\"\u003e \u003cstrong data-end=\"747\" data-start=\"711\"\u003eSlide n’ Dry Pegless Clothesline\u003c\/strong\u003e\u003c\/a\u003e, to clever storage solutions and travel essentials, every product in this range has been selected for real caravan life — not just how it looks on a shelf.\u003c\/p\u003e\n\u003cp data-end=\"1028\" data-start=\"905\"\u003eWhether you're heading away for a weekend or planning the Big Lap, these caravan accessories are made to work hard for you.\u003c\/p\u003e\n\u003chr data-end=\"1033\" data-start=\"1030\"\u003e\n\u003ch2 data-end=\"1092\" data-start=\"1035\"\u003eMust-Have Caravan Accessories for Travelling Australia\u003c\/h2\u003e\n\u003cp data-end=\"1200\" data-start=\"1094\"\u003eWhen space is limited, every item needs to earn its place. That’s why our caravan camping accessories are:\u003c\/p\u003e\n\u003cp data-end=\"1413\" data-start=\"1202\"\u003e• Lightweight and compact\u003cbr data-end=\"1230\" data-start=\"1227\"\u003e• Easy to store in tight van spaces\u003cbr data-end=\"1268\" data-start=\"1265\"\u003e• Durable for Australian conditions\u003cbr data-end=\"1306\" data-start=\"1303\"\u003e• Ideal for free camping and powered sites\u003cbr data-end=\"1351\" data-start=\"1348\"\u003e• Practical for families, grey nomads and weekend travellers\u003c\/p\u003e\n\u003cp data-end=\"1566\" data-start=\"1415\"\u003eFrom washing solutions and travel journals to storage helpers and thoughtful gifts, these are caravan must-haves designed to simplify life on the road.\u003c\/p\u003e\n\u003chr data-end=\"1571\" data-start=\"1568\"\u003e\n\u003ch2 data-end=\"1621\" data-start=\"1573\"\u003eAussie-Made Caravan Accessories You Can Trust\u003c\/h2\u003e\n\u003cp data-end=\"1759\" data-start=\"1623\"\u003eWe’re proud to stock Australian-made caravan accessories wherever possible - including our exclusive Log Books and Pegless Clotheslines.\u003c\/p\u003e\n\u003cp data-end=\"1974\" data-start=\"1761\"\u003eWhen you’re travelling across Australia, quality matters. Our range is curated for reliability, longevity and ease of use, whether you're exploring coastal roads, inland tracks or caravan parks around the country.\u003c\/p\u003e\n\u003cp data-end=\"2077\" data-start=\"1976\"\u003eShopping for caravan accessories online should feel easy - and that’s exactly what we aim to deliver.\u003c\/p\u003e\n\u003chr data-end=\"2082\" data-start=\"2079\"\u003e\n\u003ch2 data-end=\"2127\" data-start=\"2084\"\u003eCaravan Storage \u0026amp; Space-Saving Solutions\u003c\/h2\u003e\n\u003cp data-end=\"2286\" data-start=\"2129\"\u003eEvery caravanner knows the importance of smart storage. Our collection includes practical caravan accessories designed to maximise space without adding bulk.\u003c\/p\u003e\n\u003cp data-end=\"2421\" data-start=\"2288\"\u003eThink collapsible gear, compact organisers, clever washing solutions and travel tools that pack down small but make a big difference.\u003c\/p\u003e\n\u003cp data-end=\"2452\" data-start=\"2423\"\u003eLess clutter. More adventure.\u003c\/p\u003e\n\u003chr data-end=\"2457\" data-start=\"2454\"\u003e\n\u003ch2 data-end=\"2498\" data-start=\"2459\"\u003eCaravan Gift Ideas for Travellers 🎁\u003c\/h2\u003e\n\u003cp data-end=\"2621\" data-start=\"2500\"\u003eLooking for a unique gift for a caravanning family, a grey nomad couple, or someone setting off on their first adventure?\u003c\/p\u003e\n\u003cp data-end=\"2798\" data-start=\"2623\"\u003eOur caravan gift ideas are thoughtful, practical and genuinely useful - perfect for birthdays, retirements, farewell gifts or “just because” surprises before hitting the road.\u003c\/p\u003e\n\u003cp data-end=\"2859\" data-start=\"2800\"\u003eBecause the best gifts are the ones that actually get used.\u003c\/p\u003e\n\u003chr data-end=\"2864\" data-start=\"2861\"\u003e\n\u003ch2 data-end=\"2921\" data-start=\"2866\"\u003eFrequently Asked Questions About Caravan Accessories\u003c\/h2\u003e\n\u003cp data-end=\"3152\" data-start=\"2923\"\u003e\u003cstrong data-end=\"2969\" data-start=\"2923\"\u003eWhat caravan accessories do I really need?\u003c\/strong\u003e\u003cbr data-end=\"2972\" data-start=\"2969\"\u003eStart with practical essentials like a reliable clothesline, storage solutions, travel log book and compact camping gear. Focus on items that save space and make daily life easier.\u003c\/p\u003e\n\u003cp data-end=\"3309\" data-start=\"3154\"\u003e\u003cstrong data-end=\"3205\" data-start=\"3154\"\u003eDo you ship caravan accessories Australia-wide?\u003c\/strong\u003e\u003cbr data-end=\"3208\" data-start=\"3205\"\u003eYes! We ship our caravan accessories across Australia so you can get organised before your next trip.\u003c\/p\u003e\n\u003cp data-end=\"3484\" data-start=\"3311\"\u003e\u003cstrong data-end=\"3370\" data-start=\"3311\"\u003eAre your caravan accessories suitable for free camping?\u003c\/strong\u003e\u003cbr data-end=\"3373\" data-start=\"3370\"\u003eAbsolutely. Many products in our range are lightweight, compact and ideal for off-grid and free camping setups.\u003c\/p\u003e\n\u003cp data-end=\"3690\" data-start=\"3486\"\u003e\u003cstrong data-end=\"3539\" data-start=\"3486\"\u003eDo you stock Australian-made caravan accessories?\u003c\/strong\u003e\u003cbr data-end=\"3542\" data-start=\"3539\"\u003eYes — we proudly stock a number of Aussie-made favourites, including our exclusive\u003ca rel=\"noopener\" href=\"https:\/\/www.adventureawaits.com.au\/products\/map-of-australia-sticker\" target=\"_blank\"\u003e Map of Australia Stickers\u003c\/a\u003e, Caravan \u0026amp; Camper Log Books and Slide n’ Dry Pegless Clotheslines.\u003c\/p\u003e\n\u003chr data-end=\"3695\" data-start=\"3692\"\u003e\n\u003ch2 data-end=\"3718\" data-start=\"3697\"\u003eTravel Made Simple\u003c\/h2\u003e\n\u003cp data-end=\"3875\" data-start=\"3720\"\u003eFrom practical essentials to quirky caravan gift ideas, our Caravan Accessories collection is all about making life on the road simpler and more enjoyable.\u003c\/p\u003e\n\u003cp data-end=\"4013\" data-start=\"3877\"\u003eIf you love clever, space-saving and genuinely useful caravan accessories designed for Australian travellers, you’re in the right place.\u003c\/p\u003e\n\u003cp data-end=\"4074\" data-start=\"4015\"\u003eExplore the range and get ready for your next adventure 🚐\u003c\/p\u003e","image":{"created_at":"2025-08-28T14:32:01+10:00","alt":null,"width":1080,"height":1082,"src":"\/\/www.adventureawaits.com.au\/cdn\/shop\/collections\/caravanheartbeatstickerwhiteoncar.jpg?v=1756355521"}},{"id":201735798939,"handle":"caravanning-camping","updated_at":"2026-06-24T21:10:14+10:00","published_at":"2020-06-19T11:34:47+10:00","sort_order":"manual","template_suffix":"caravan-camping","published_scope":"global","title":"Caravanning \u0026 Camping","body_html":"\u003ch2 data-start=\"1003\" data-end=\"1405\"\u003e\u003cstrong data-start=\"1003\" data-end=\"1094\"\u003eGear up for your next adventure with our best-selling Caravanning \u0026amp; Camping essentials!\u003c\/strong\u003e\u003c\/h2\u003e\n\u003cp data-start=\"1003\" data-end=\"1405\"\u003eFrom practical gadgets to Aussie-made favourites, this collection is packed with clever gear that makes life on the road easier, safer, and more fun. Whether you're a first-time caravanner or seasoned grey nomad, you'll find space-saving solutions, travel-friendly accessories and must-have camping products.\u003c\/p\u003e\n\u003cp data-start=\"1407\" data-end=\"1720\"\u003e⭐ Popular picks include our \u003ca data-start=\"1435\" data-end=\"1534\" rel=\"noopener\" class=\"\" href=\"https:\/\/www.adventureawaits.com.au\/collections\/pegless-clotheslines-laundry\" target=\"_blank\"\u003ePegless Clotheslines\u003c\/a\u003e, \u003ca href=\"https:\/\/www.adventureawaits.com.au\/collections\/map-of-australia-stickers\" target=\"_blank\" rel=\"noopener\"\u003eMap of Australia Stickers\u003c\/a\u003e, and \u003ca href=\"https:\/\/www.adventureawaits.com.au\/collections\/travel-books\" target=\"_blank\" rel=\"noopener\"\u003eCaravan Log Book.\u003c\/a\u003e\u003c\/p\u003e\n\u003cp data-start=\"1722\" data-end=\"1795\"\u003eLet the adventures begin – we’ve got everything you need to travel smart!\u003c\/p\u003e","image":{"created_at":"2025-06-01T13:23:14+10:00","alt":null,"width":4000,"height":4000,"src":"\/\/www.adventureawaits.com.au\/cdn\/shop\/collections\/Caravan_and_Camper_log_Book_Adventure_Awaits_on_grass_81a4b0d0-9a92-4f77-905f-8d3061fead53.jpg?v=1748748194"}},{"id":416559694045,"handle":"everything-excluding-onsale","title":"EVERYTHING excluding ONSALE","updated_at":"2026-06-25T15:45:01+10:00","body_html":"","published_at":"2023-03-19T20:35:31+11:00","sort_order":"created-desc","template_suffix":"","disjunctive":false,"rules":[{"column":"tag","relation":"equals","condition":"ALL"}],"published_scope":"web"},{"id":269851459776,"handle":"fathers-day-gifts-australia","updated_at":"2026-06-25T15:45:01+10:00","published_at":"2021-05-25T21:23:17+10:00","sort_order":"manual","template_suffix":"","published_scope":"global","title":"Father's Day Gifts","body_html":"\u003cdiv\u003e\n\u003cdiv dir=\"auto\"\u003e\n\u003cdiv\u003e\n\u003cdiv\u003e\n\u003cp data-start=\"163\" data-end=\"246\"\u003e\u003cstrong data-start=\"163\" data-end=\"246\"\u003eFather’s Day Gifts — Perfect Presents for Dad, Grandad \u0026amp; All the Special Blokes\u003c\/strong\u003e\u003c\/p\u003e\n\u003cp data-start=\"248\" data-end=\"508\"\u003eAt Adventure Awaits, we’ve got your Father’s Day gift shopping covered! Whether it’s for Dad, Grandad, Pa, Pop, or that special fella in your life, our huge range of over 500 fantastic, fun, and practical gifts is guaranteed to bring a smile this Father’s Day.\u003c\/p\u003e\n\u003cp data-start=\"510\" data-end=\"740\"\u003eFrom rugged \u003cstrong data-start=\"522\" data-end=\"538\"\u003ecamping gear\u003c\/strong\u003e and handy \u003cstrong data-start=\"549\" data-end=\"567\"\u003eback scrubbers\u003c\/strong\u003e, to stylish \u003cstrong data-start=\"580\" data-end=\"598\"\u003estubby coolers\u003c\/strong\u003e, premium \u003cstrong data-start=\"608\" data-end=\"626\"\u003ebeard gear\u003c\/strong\u003e, and quirky \u003cstrong data-start=\"639\" data-end=\"654\"\u003ecoffee cups\u003c\/strong\u003e - we’ve handpicked the best Aussie-made and unique gifts that Dad will actually love.\u003c\/p\u003e\n\u003cp data-start=\"742\" data-end=\"1066\"\u003eOur top sellers from past years keep flying off the shelves - like the ever-popular \u003cstrong data-start=\"826\" data-end=\"846\"\u003eStandard Squeeze\u003c\/strong\u003e, versatile \u003cstrong data-start=\"858\" data-end=\"892\"\u003eTooletries bathroom organisers\u003c\/strong\u003e, and the fun \u003cstrong data-start=\"906\" data-end=\"920\"\u003eBug-A-Salt\u003c\/strong\u003e pest zapper. Whether you’re after practical, adventurous, or just downright fun gifts, our Father’s Day collection has something for every bloke.\u003c\/p\u003e\n\u003cp data-start=\"1068\" data-end=\"1258\"\u003eShop now for \u003cstrong data-start=\"1081\" data-end=\"1098\"\u003eaward-winning\u003c\/strong\u003e, \u003cstrong data-start=\"1100\" data-end=\"1119\"\u003eAustralian made\u003c\/strong\u003e and \u003cstrong data-start=\"1124\" data-end=\"1148\"\u003ecaravanning-approved\u003c\/strong\u003e Father’s Day gifts that stand out from the crowd. Make this Father’s Day unforgettable with Adventure Awaits!\u003c\/p\u003e\n\u003c\/div\u003e\n\u003c\/div\u003e\n\u003c\/div\u003e\n\u003c\/div\u003e\n\u003cp\u003eFrom \u003ca href=\"https:\/\/www.adventureawaits.com.au\/collections\/alcoholder\/products\/alcoholder-stubzero-can-stubby-cooler-available-in-six-colours\" rel=\"noopener noreferrer\" target=\"_blank\"\u003eStubby Coolers\u003c\/a\u003e to \u003ca href=\"https:\/\/www.adventureawaits.com.au\/collections\/ticket-to-the-moon-hammocks-and-straps\" rel=\"noopener noreferrer\" target=\"_blank\"\u003eHammocks\u003c\/a\u003e, From \u003ca href=\"https:\/\/www.adventureawaits.com.au\/search?q=beard\" rel=\"noopener noreferrer\" target=\"_blank\"\u003eBeard Shampoo\u003c\/a\u003e to \u003ca href=\"https:\/\/www.adventureawaits.com.au\/products\/tooletries-the-back-scrubber?_pos=1\u0026amp;_sid=7f27d3916\u0026amp;_ss=r\" rel=\"noopener noreferrer\" target=\"_blank\"\u003eBack Scrubber\u003c\/a\u003es, From\u003ca href=\"https:\/\/www.adventureawaits.com.au\/collections\/klipsta-hat-clips\" rel=\"noopener noreferrer\" target=\"_blank\"\u003e Specs Holder\u003c\/a\u003e to \u003ca href=\"https:\/\/www.adventureawaits.com.au\/search?q=coffee+\" rel=\"noopener noreferrer\" target=\"_blank\"\u003eCoffee Cups\u003c\/a\u003e, From \u003ca href=\"https:\/\/www.adventureawaits.com.au\/collections\/caravanning-camping\" rel=\"noopener noreferrer\" target=\"_blank\"\u003eCamping Gear\u003c\/a\u003e to \u003ca href=\"https:\/\/www.adventureawaits.com.au\/search?q=dad\" rel=\"noopener noreferrer\" target=\"_blank\"\u003eDad Books...\u003c\/a\u003e\u003c\/p\u003e\n\u003cp\u003e\u003ca href=\"https:\/\/www.adventureawaits.com.au\/collections\/the-standard-squeeze-bottle\" target=\"_blank\"\u003eThe Standard Squeeze\u003c\/a\u003e \u003c\/p\u003e\n\u003cp\u003e\u003ca href=\"https:\/\/www.adventureawaits.com.au\/collections\/tooletries-bathroom-organisers\" target=\"_blank\"\u003eTooletries Bathroom Organisers\u003c\/a\u003e\u003c\/p\u003e\n\u003cp\u003e\u003ca href=\"https:\/\/www.adventureawaits.com.au\/collections\/bug-a-salt\" rel=\"noopener noreferrer\" target=\"_blank\"\u003eBug-A-Salt\u003c\/a\u003e\u003c\/p\u003e","image":{"created_at":"2024-08-27T20:03:17+10:00","alt":null,"width":900,"height":900,"src":"\/\/www.adventureawaits.com.au\/cdn\/shop\/collections\/tooletries_harvey.png?v=1724752998"}},{"id":199904559259,"handle":"gifts-for-him","updated_at":"2026-06-25T15:45:01+10:00","published_at":"2020-06-08T20:43:15+10:00","sort_order":"created-desc","template_suffix":"","published_scope":"global","title":"Gifts for Him","body_html":"\u003ch2 data-start=\"44\" data-end=\"102\"\u003eGifts for Him – Unique, Practical \u0026amp; Full of Character\u003c\/h2\u003e\n\u003cp data-start=\"104\" data-end=\"141\"\u003e\u003cspan class=\"relative -mx-px my-[-0.2rem] rounded px-px py-[0.2rem] transition-colors duration-100 ease-in-out\"\u003eDiscover distinctive presents for the men and boys in your life - from playful collectibles to clever gadgets, all chosen with care by fellow outdoor- and game-loving Aussies.\u003c\/span\u003e\u003c\/p\u003e\n\u003ch3 data-start=\"143\" data-end=\"164\"\u003eWhat You'll Find:\u003c\/h3\u003e\n\u003cul data-start=\"165\" data-end=\"647\"\u003e\n\u003cli data-start=\"165\" data-end=\"244\"\u003e\n\u003cp data-start=\"168\" data-end=\"244\"\u003e\u003cspan class=\"relative -mx-px my-[-0.2rem] rounded px-px py-[0.2rem] transition-colors duration-100 ease-in-out\"\u003e\u003cstrong data-start=\"0\" data-end=\"27\" data-is-only-node=\"\"\u003ePop Culture \u0026amp; Nostalgia\u003c\/strong\u003e – Catch eye-catching items like the \u003cstrong data-start=\"64\" data-end=\"93\"\u003eCobra Kai Mini‑X figurine\u003c\/strong\u003e, \u003cstrong data-start=\"95\" data-end=\"115\"\u003eYoda stretch toy\u003c\/strong\u003e, and \u003cstrong data-start=\"121\" data-end=\"147\"\u003eMetal Earth Model Kits\u003c\/strong\u003e featuring the Titanic or Melbourne W‑Class Tram\u003c\/span\u003e \u003cspan class=\"\" data-state=\"closed\"\u003e\u003cspan class=\"ms-1 inline-flex max-w-full items-center relative top-[-0.094rem] animate-[show_150ms_ease-in]\" data-testid=\"webpage-citation-pill\"\u003e\u003c\/span\u003e\u003c\/span\u003e\u003c\/p\u003e\n\u003c\/li\u003e\n\u003cli data-start=\"245\" data-end=\"323\"\u003e\n\u003cp data-start=\"247\" data-end=\"323\"\u003e\u003cspan class=\"relative -mx-px my-[-0.2rem] rounded px-px py-[0.2rem] transition-colors duration-100 ease-in-out\"\u003e\u003cstrong data-start=\"0\" data-end=\"22\" data-is-only-node=\"\"\u003eBoard \u0026amp; Card Games\u003c\/strong\u003e – Dive into classic favorites like \u003cstrong data-start=\"58\" data-end=\"79\"\u003eOriginal Scrabble\u003c\/strong\u003e, engaging strategy games like \u003cstrong data-start=\"110\" data-end=\"119\"\u003eCatan\u003c\/strong\u003e (plus the Starfarers expansion), or refined sets like the \u003cstrong data-start=\"178\" data-end=\"207\" data-is-last-node=\"\"\u003eDal Rossi Backgammon Case\u003c\/strong\u003e\u003c\/span\u003e \u003cspan class=\"\" data-state=\"closed\"\u003e\u003cspan class=\"ms-1 inline-flex max-w-full items-center relative top-[-0.094rem] animate-[show_150ms_ease-in]\" data-testid=\"webpage-citation-pill\"\u003e\u003c\/span\u003e\u003c\/span\u003e\u003c\/p\u003e\n\u003c\/li\u003e\n\u003cli data-start=\"324\" data-end=\"402\"\u003e\n\u003cp data-start=\"326\" data-end=\"402\"\u003e\u003cspan class=\"relative -mx-px my-[-0.2rem] rounded px-px py-[0.2rem] transition-colors duration-100 ease-in-out\"\u003e\u003cstrong data-start=\"0\" data-end=\"22\" data-is-only-node=\"\"\u003eGames With a Twist\u003c\/strong\u003e – Bring levity to any gathering with the quirky \u003cstrong data-start=\"71\" data-end=\"100\"\u003e\"Guess Poo?\" Mystery Game\u003c\/strong\u003e or cheeky \u003cstrong data-start=\"111\" data-end=\"144\"\u003eKevin Bloody Wilson Pub Krawl\u003c\/strong\u003e board game\u003c\/span\u003e \u003c\/p\u003e\n\u003c\/li\u003e\n\u003cli data-start=\"403\" data-end=\"481\"\u003e\n\u003cp data-start=\"405\" data-end=\"481\"\u003e\u003cspan class=\"relative -mx-px my-[-0.2rem] rounded px-px py-[0.2rem] transition-colors duration-100 ease-in-out\"\u003e\u003cstrong data-start=\"0\" data-end=\"17\" data-is-only-node=\"\"\u003eModels \u0026amp; Kits\u003c\/strong\u003e – Spark creativity and focus with captivating DIY builds, including the \u003cstrong data-start=\"90\" data-end=\"117\"\u003eRMS Titanic Steel Model\u003c\/strong\u003e and more.\u003c\/span\u003e\u003c\/p\u003e\n\u003c\/li\u003e\n\u003cli data-start=\"482\" data-end=\"564\"\u003e\n\u003cp data-start=\"484\" data-end=\"564\"\u003e\u003cspan class=\"relative -mx-px my-[-0.2rem] rounded px-px py-[0.2rem] transition-colors duration-100 ease-in-out\"\u003e\u003cstrong data-start=\"0\" data-end=\"31\" data-is-only-node=\"\"\u003eEssentials \u0026amp; Practical Gear\u003c\/strong\u003e – From the \u003cstrong data-start=\"43\" data-end=\"72\"\u003eKlipsta Hat Clips and Spex Glasses Holders\u003c\/strong\u003e to the \u003cstrong data-start=\"80\" data-end=\"107\"\u003eSURVIVAL First Aid Kits\u003c\/strong\u003e, thoughtfully versatile gifts that go beyond the ordinary\u003c\/span\u003e - Plus a huge range of \u003ca href=\"https:\/\/www.adventureawaits.com.au\/collections\/caravanning-camping\" target=\"_blank\" rel=\"noopener\"\u003e\u003cstrong\u003eCaravanning \u0026amp; Camping Gear\u003c\/strong\u003e\u003c\/a\u003e for the outdoor fellas.\u003c\/p\u003e\n\u003c\/li\u003e\n\u003cli data-start=\"565\" data-end=\"647\"\u003e\n\u003cp data-start=\"567\" data-end=\"647\"\u003e\u003cspan class=\"relative -mx-px my-[-0.2rem] rounded px-px py-[0.2rem] transition-colors duration-100 ease-in-out\"\u003e\u003cstrong data-start=\"0\" data-end=\"17\" data-is-only-node=\"\"\u003eFun Keepsakes\u003c\/strong\u003e – Delight with items like the playful \u003cstrong data-start=\"56\" data-end=\"83\"\u003e\"Best Dad\" trinket dish\u003c\/strong\u003e and uniquely curated \u003cstrong data-start=\"105\" data-end=\"142\" data-is-last-node=\"\"\u003eGift Cupboard Mystery Box for Him\u003c\/strong\u003e\u003c\/span\u003e \u003cspan class=\"\" data-state=\"closed\"\u003e\u003cspan class=\"ms-1 inline-flex max-w-full items-center relative top-[-0.094rem] animate-[show_150ms_ease-in]\" data-testid=\"webpage-citation-pill\"\u003e\u003c\/span\u003e\u003c\/span\u003e\u003c\/p\u003e\n\u003c\/li\u003e\n\u003c\/ul\u003e\n\u003chr data-start=\"649\" data-end=\"652\"\u003e\n\u003ch3 data-start=\"654\" data-end=\"689\"\u003eWhy This Collection Stands Out:\u003c\/h3\u003e\n\u003cul data-start=\"690\" data-end=\"815\"\u003e\n\u003cli data-start=\"690\" data-end=\"731\"\u003e\n\u003cp data-start=\"692\" data-end=\"731\"\u003e\u003cspan class=\"relative -mx-px my-[-0.2rem] rounded px-px py-[0.2rem] transition-colors duration-100 ease-in-out\"\u003e\u003cstrong data-start=\"0\" data-end=\"24\" data-is-only-node=\"\"\u003eUniquely Adventurous\u003c\/strong\u003e – Each product adds personality and fun to everyday life.\u003c\/span\u003e\u003c\/p\u003e\n\u003c\/li\u003e\n\u003cli data-start=\"732\" data-end=\"773\"\u003e\n\u003cp data-start=\"734\" data-end=\"773\"\u003e\u003cspan class=\"relative -mx-px my-[-0.2rem] rounded px-px py-[0.2rem] transition-colors duration-100 ease-in-out\"\u003e\u003cstrong data-start=\"0\" data-end=\"28\" data-is-only-node=\"\"\u003eSomething for Every Type\u003c\/strong\u003e – Whether he’s into games, models, practical gear, or just a good laugh - there’s a standout find here.\u003c\/span\u003e\u003c\/p\u003e\n\u003c\/li\u003e\n\u003cli data-start=\"774\" data-end=\"815\"\u003e\n\u003cp data-start=\"776\" data-end=\"815\"\u003e\u003cspan class=\"relative -mx-px my-[-0.2rem] rounded px-px py-[0.2rem] transition-colors duration-100 ease-in-out\"\u003e\u003cstrong data-start=\"0\" data-end=\"28\" data-is-only-node=\"\"\u003ePerfect for Any Occasion\u003c\/strong\u003e – Great gifts for birthdays, milestones, or just because.\u003c\/span\u003e\u003c\/p\u003e\n\u003c\/li\u003e\n\u003c\/ul\u003e\n\u003chr data-start=\"817\" data-end=\"820\"\u003e\n\u003ch3 data-start=\"822\" data-end=\"861\"\u003eExplore More from Adventure Awaits:\u003c\/h3\u003e\n\u003cp data-start=\"862\" data-end=\"901\"\u003e\u003cspan class=\"relative -mx-px my-[-0.2rem] rounded px-px py-[0.2rem] transition-colors duration-100 ease-in-out\"\u003eLooking for more inspiration or themed bundles?\u003c\/span\u003e\u003c\/p\u003e\n\u003cul data-start=\"902\" data-end=\"1025\"\u003e\n\u003cli data-start=\"902\" data-end=\"943\"\u003e\n\u003cp data-start=\"904\" data-end=\"943\"\u003e\u003cspan class=\"relative -mx-px my-[-0.2rem] rounded px-px py-[0.2rem] transition-colors duration-100 ease-in-out\"\u003eCheck out our \u003ca href=\"https:\/\/www.adventureawaits.com.au\/collections\/board-games\" target=\"_blank\" rel=\"noopener\"\u003e\u003cstrong data-start=\"14\" data-end=\"40\"\u003eBoard Games Collection\u003c\/strong\u003e\u003c\/a\u003e for deeper gaming experiences.\u003c\/span\u003e\u003c\/p\u003e\n\u003c\/li\u003e\n\u003cli data-start=\"944\" data-end=\"1025\"\u003e\n\u003cp data-start=\"946\" data-end=\"1025\"\u003e\u003cspan class=\"relative -mx-px my-[-0.2rem] rounded px-px py-[0.2rem] transition-colors duration-100 ease-in-out\"\u003eExplore \u003ca href=\"https:\/\/www.adventureawaits.com.au\/collections\/australian-made\" target=\"_blank\" rel=\"noopener\"\u003e\u003cstrong data-start=\"8\" data-end=\"33\"\u003eAustralian-Made Gifts\u003c\/strong\u003e \u003c\/a\u003efor locally crafted treasures.\u003c\/span\u003e\u003c\/p\u003e\n\u003c\/li\u003e\n\u003c\/ul\u003e\n\u003chr data-start=\"1027\" data-end=\"1030\"\u003e\n\u003cp data-start=\"1032\" data-end=\"1141\"\u003e\u003cstrong data-start=\"1032\" data-end=\"1087\"\u003eAdventure Awaits ships daily from regional Victoria\u003c\/strong\u003e, Australia - ensuring fast delivery across the country.\u003c\/p\u003e\n\u003cp data-start=\"1143\" data-end=\"1253\"\u003eReady to surprise him with something he'll actually love? \u003cstrong data-start=\"1201\" data-end=\"1253\"\u003eStart browsing - gifts like these won't last long!\u003c\/strong\u003e\u003c\/p\u003e","image":{"created_at":"2025-08-28T14:39:34+10:00","alt":null,"width":451,"height":451,"src":"\/\/www.adventureawaits.com.au\/cdn\/shop\/collections\/spexglassesclipstone.jpg?v=1756355974"}},{"id":198661734555,"handle":"hema-maps","updated_at":"2026-06-24T21:10:14+10:00","published_at":"2020-05-31T22:49:00+10:00","sort_order":"created-desc","template_suffix":"","published_scope":"global","title":"Hema Maps","body_html":"\u003cp data-start=\"279\" data-end=\"341\"\u003e\u003cstrong data-start=\"279\" data-end=\"341\"\u003eHema Maps \u0026amp; Travel Maps Australia\u003c\/strong\u003e\u003c\/p\u003e\n\u003cp data-start=\"343\" data-end=\"599\"\u003eLove the thrill of spreading out a real map and planning your next big Aussie adventure? So do we! At Adventure Awaits, we’ve curated a brilliant collection of \u003cstrong data-start=\"503\" data-end=\"516\"\u003eHema Maps\u003c\/strong\u003e – Australia’s most trusted travel maps – to help you hit the road with confidence.\u003c\/p\u003e\n\u003cp data-start=\"601\" data-end=\"991\"\u003eWhether you’re heading off in the caravan, 4WDing through the outback, or mapping out the ultimate camping trip, \u003cstrong data-start=\"714\" data-end=\"737\"\u003eHema road trip maps\u003c\/strong\u003e are the go-to for detail, durability, and reliability. These maps are packed with essential info for travellers, including campsites, fuel stops, national parks, 4WD tracks, and more. It's no wonder Hema Maps are loved by adventurers all over Australia!\u003c\/p\u003e\n\u003cp data-start=\"993\" data-end=\"1272\"\u003eFrom laminated wall maps of Australia and \u003cstrong data-start=\"1035\" data-end=\"1054\"\u003eHema state maps\u003c\/strong\u003e to handy Hema map wallets for life on the go, you’ll find something for every kind of journey. Our range includes all the popular regions – Outback Queensland, Tasmania, Western Australia, the High Country and beyond.\u003c\/p\u003e\n\u003cp data-start=\"1274\" data-end=\"1388\"\u003e🗺️ \u003cstrong data-start=\"1278\" data-end=\"1302\"\u003eBuy Hema Maps online\u003c\/strong\u003e at Adventure Awaits and get ready to explore Australia with the best in the business.\u003c\/p\u003e\n\u003cp data-start=\"1390\" data-end=\"1597\"\u003eNothing beats the feeling of planning your route with a proper printed map in your hands. It’s practical, it’s inspiring – and it’s a keepsake of all the places you’ve been (and the ones you’re dreaming of).\u003c\/p\u003e\n\u003cp data-start=\"1599\" data-end=\"1776\"\u003eSo whether you're after \u003cstrong data-start=\"1623\" data-end=\"1644\"\u003eHema touring maps\u003c\/strong\u003e, a \u003cstrong data-start=\"1648\" data-end=\"1681\"\u003elarge laminated Australia map\u003c\/strong\u003e, or one of our \u003ca href=\"https:\/\/www.adventureawaits.com.au\/collections\/map-of-australia-stickers\" target=\"_blank\" rel=\"noopener\"\u003e\u003cstrong data-start=\"1697\" data-end=\"1726\"\u003eMap of Australia stickers\u003c\/strong\u003e\u003c\/a\u003e to track your travels, you're in the right place.\u003c\/p\u003e\n\u003cp data-start=\"1778\" data-end=\"1881\"\u003e✨ Shop our full range of \u003cstrong data-start=\"1803\" data-end=\"1829\"\u003eAustralian travel maps\u003c\/strong\u003e and start planning your next unforgettable journey.\u003c\/p\u003e","image":{"created_at":"2020-05-31T22:55:23+10:00","alt":null,"width":800,"height":800,"src":"\/\/www.adventureawaits.com.au\/cdn\/shop\/collections\/hema_maps.jpg?v=1590929724"}},{"id":199904788635,"handle":"maps","updated_at":"2026-06-25T15:45:01+10:00","published_at":"2020-06-08T20:43:15+10:00","sort_order":"manual","template_suffix":"","published_scope":"global","title":"Maps of Australia for Caravans, Travel \u0026 Kids | Adventure Awaits","body_html":"\u003cp class=\"font-claude-response-body break-words whitespace-normal leading-[1.7]\"\u003e⭐ Our most popular map product - \u003cstrong\u003e\u003ca class=\"underline underline underline-offset-2 decoration-1 decoration-current\/40 hover:decoration-current focus:decoration-current\" href=\"https:\/\/www.adventureawaits.com.au\/collections\/map-of-australia-stickers\" target=\"_blank\" rel=\"noopener\"\u003eMap of Australia Sticker Decals\u003c\/a\u003e\u003c\/strong\u003e - trusted by thousands of Aussie caravanners for over 10 years. Perfect for van drop-down tables, fridge doors and walls. Australian made \u0026amp; ships daily. \u003cstrong\u003e\u003ca class=\"underline underline underline-offset-2 decoration-1 decoration-current\/40 hover:decoration-current focus:decoration-current\" href=\"https:\/\/www.adventureawaits.com.au\/collections\/map-of-australia-stickers\" target=\"_blank\" rel=\"noopener\"\u003eShop all Map Stickers →\u003c\/a\u003e\u003c\/strong\u003e\u003c\/p\u003e\n\u003chr class=\"border-border-200 border-t-0.5 my-3 mx-1.5\"\u003e\n\u003cp class=\"font-claude-response-body break-words whitespace-normal leading-[1.7]\"\u003e\u003cem\u003ePlanning your next Aussie road trip or caravan adventure? Our Maps of Australia collection has everything you need:\u003c\/em\u003e\u003c\/p\u003e\n\u003cp class=\"font-claude-response-body break-words whitespace-normal leading-[1.7]\"\u003e🧭 \u003cstrong\u003eHEMA Maps\u003c\/strong\u003e - Australia's most trusted road trip and off-road travel maps, loved by 4WDers, campers and grey nomads\u003c\/p\u003e\n\u003cp class=\"font-claude-response-body break-words whitespace-normal leading-[1.7]\"\u003e🏷️ \u003cstrong\u003eMap of Australia Sticker Decals\u003c\/strong\u003e - Australian made, UV-rated and perfect for caravans, fridge doors and travel walls\u003c\/p\u003e\n\u003cp class=\"font-claude-response-body break-words whitespace-normal leading-[1.7]\"\u003e🗺️ \u003cstrong\u003eAtlas wallets, state maps and regional guides\u003c\/strong\u003e - for every kind of Aussie adventure, from the coast to the outback\u003c\/p\u003e\n\u003cp class=\"font-claude-response-body break-words whitespace-normal leading-[1.7]\"\u003eWhether you're tackling the Big Lap, heading into the Red Centre, or planning a family road trip down the Great Ocean Road - we've got the maps to get you there and the stickers to remember where you've been.\u003c\/p\u003e","image":{"created_at":"2025-05-21T12:53:16+10:00","alt":null,"width":800,"height":580,"src":"\/\/www.adventureawaits.com.au\/cdn\/shop\/collections\/hema_map_of_australia_wall_map.png?v=1747795996"}},{"id":241067950272,"handle":"new-arrivals","updated_at":"2026-06-25T15:45:01+10:00","published_at":"2021-01-16T10:54:54+11:00","sort_order":"created-desc","template_suffix":"","published_scope":"global","title":"NEW ARRIVALS at Adventure Awaits","body_html":"\u003cp data-start=\"175\" data-end=\"344\"\u003eDiscover the latest treasures at Adventure Awaits! 💥 This is where all the fun begins – our newest arrivals are packed with personality, purpose and a whole lot of WOW.\u003c\/p\u003e\n\u003cp data-start=\"346\" data-end=\"652\"\u003eFrom clever caravan must-haves to quirky gifts, kids’ travel gear, and eco-friendly favourites – every new product is handpicked by our team, tried, tested, and totally loved. Whether you're into caravanning, camping, cruising or just chasing good vibes, these fresh finds are made for your next adventure.\u003c\/p\u003e\n\u003cp data-start=\"654\" data-end=\"802\"\u003e🏆 Proudly awarded \u003cem data-start=\"673\" data-end=\"716\"\u003e2023 Bricks \u0026amp; Mortar Retailer of the Year\u003c\/em\u003e at the Australian Rural Business Awards – pop in and say g’day if you’re ever nearby!\u003c\/p\u003e\n\u003cp data-start=\"804\" data-end=\"957\"\u003eWant to be the first to hear about new arrivals, specials and VIP-only perks? Join our \u003ca href=\"https:\/\/www.facebook.com\/groups\/adventureawaitsVIPGroup\" target=\"_blank\" rel=\"noopener\"\u003e\u003cstrong data-start=\"891\" data-end=\"935\"\u003eFREE Adventure Awaits VIP Facebook Group\u003c\/strong\u003e\u003c\/a\u003e and stay in the loop!\u003c\/p\u003e","image":{"created_at":"2025-06-17T10:27:30+10:00","alt":null,"width":4032,"height":3024,"src":"\/\/www.adventureawaits.com.au\/cdn\/shop\/collections\/Shop_front_NEW_adventure_awaits.jpg?v=1750120050"}},{"id":448891715805,"handle":"teal-friday-sale-2025","updated_at":"2026-06-25T15:17:04+10:00","published_at":"2025-11-19T11:23:48+11:00","sort_order":"manual","template_suffix":"","published_scope":"global","title":"TEAL FRIDAY SALE 2025","body_html":"\u003ch2\u003eOur sale has ENDED! THANK YOU so much for joining our TEAL FRIDAY sale...we hope to see you back next year...\u003c\/h2\u003e\n\u003cp\u003e\u003cspan style=\"color: rgb(3, 130, 155);\"\u003e\u003cstrong\u003eWHY TEAL FRIDAY \u0026amp; NOT BLACK FRIDAY???\u003c\/strong\u003e\u003c\/span\u003e\u003ca rel=\"noopener\" href=\"https:\/\/www.adventureawaits.com.au\/blogs\/news\/why-we-re-turning-black-friday-teal\" target=\"_blank\"\u003e\u003cspan style=\"color: rgb(3, 130, 155);\"\u003e\u003cstrong\u003e \u003c\/strong\u003e\u003c\/span\u003eRead all out our WHY here...\u003c\/a\u003e\u003c\/p\u003e","image":{"created_at":"2025-11-18T11:53:08+11:00","alt":null,"width":1080,"height":1080,"src":"\/\/www.adventureawaits.com.au\/cdn\/shop\/collections\/Black_Friday_2025.png?v=1763427189"}},{"id":201735176347,"handle":"travel-accessories","updated_at":"2026-06-25T15:45:01+10:00","published_at":"2020-06-19T11:34:47+10:00","sort_order":"manual","template_suffix":"","published_scope":"global","title":"Travel Accessories","body_html":"\u003cp data-start=\"263\" data-end=\"528\"\u003e\u003cstrong data-start=\"263\" data-end=\"296\"\u003eTried, Tested \u0026amp; Travel-Ready!\u003c\/strong\u003e\u003cbr data-start=\"296\" data-end=\"299\"\u003e\u003c\/p\u003e\n\u003cp data-start=\"263\" data-end=\"528\"\u003eAn eclectic mix of \u003cstrong data-start=\"318\" data-end=\"351\"\u003eclever and practical products\u003c\/strong\u003e that are perfect for all your adventures – whether you're \u003cstrong data-start=\"410\" data-end=\"442\"\u003ecaravanning across Australia\u003c\/strong\u003e, \u003cstrong data-start=\"444\" data-end=\"464\"\u003ecamping off-grid\u003c\/strong\u003e, \u003cstrong data-start=\"466\" data-end=\"488\"\u003ecruising the coast\u003c\/strong\u003e, or hitting the road with the family.\u003c\/p\u003e\n\u003cp data-start=\"530\" data-end=\"762\"\u003eEvery item in this collection has been \u003cstrong data-start=\"569\" data-end=\"608\"\u003etried, tested and LOVED by our team\u003c\/strong\u003e – so you know it's a winner. From space-saving travel gear to thoughtful travel gifts, these goodies are just as handy at home as they are on the move.\u003c\/p\u003e\n\u003cp data-start=\"764\" data-end=\"873\"\u003e\u003cstrong data-start=\"764\" data-end=\"873\"\u003eGreat for road trips, camping, cruising or daily life – these travel accessories are built for adventure.\u003c\/strong\u003e\u003c\/p\u003e","image":{"created_at":"2025-06-17T10:06:49+10:00","alt":null,"width":4256,"height":2832,"src":"\/\/www.adventureawaits.com.au\/cdn\/shop\/collections\/TWK_Travel_Journal_Lifestyle_image_fb00af4c-cf56-4ef2-af42-8b35d89e0b2d.jpg?v=1750118809"}},{"id":198542622875,"handle":"travel-gifts-gear","updated_at":"2026-06-25T15:45:01+10:00","published_at":"2020-05-30T23:00:38+10:00","sort_order":"best-selling","template_suffix":"","published_scope":"global","title":"Travel Gifts \u0026 Gear","body_html":"\u003ch2 data-start=\"422\" data-end=\"473\"\u003eTravel Gifts \u0026amp; Gear – Adventure Begins Here ✈️\u003c\/h2\u003e\n\u003cp data-start=\"475\" data-end=\"746\"\u003eAt \u003cstrong data-start=\"478\" data-end=\"498\"\u003eAdventure Awaits\u003c\/strong\u003e, we know the best adventures start with the right gear. Our \u003cstrong data-start=\"559\" data-end=\"593\"\u003eTravel Gifts \u0026amp; Gear Collection\u003c\/strong\u003e is filled with practical, high-quality, and fun essentials that make road trips, camping escapes, and overseas adventures smoother and more memorable.\u003c\/p\u003e\n\u003ch3 data-start=\"748\" data-end=\"795\"\u003eWhy Aussie Travellers Love Our Collection\u003c\/h3\u003e\n\u003cul data-start=\"796\" data-end=\"1545\"\u003e\n\u003cli data-start=\"796\" data-end=\"939\"\u003e\n\u003cp data-start=\"798\" data-end=\"939\"\u003e\u003cstrong data-start=\"798\" data-end=\"826\"\u003eMap of Australia Sticker\u003c\/strong\u003e – a must-have for caravanners and campers, perfect for tracking your travels across every state and territory.\u003c\/p\u003e\n\u003c\/li\u003e\n\u003cli data-start=\"940\" data-end=\"1081\"\u003e\n\u003cp data-start=\"942\" data-end=\"1081\"\u003e\u003cstrong data-start=\"942\" data-end=\"965\"\u003ePegless Clothesline\u003c\/strong\u003e – our award-winning Aussie invention that saves space and makes drying clothes easy on the road - no pegs required!\u003c\/p\u003e\n\u003c\/li\u003e\n\u003cli data-start=\"1082\" data-end=\"1239\"\u003e\n\u003cp data-start=\"1084\" data-end=\"1239\"\u003e\u003cstrong data-start=\"1084\" data-end=\"1107\"\u003eKids Travel Journal\u003c\/strong\u003e – our best-selling, Australian-made travel diary that helps little explorers capture their adventures and memories along the way.\u003c\/p\u003e\n\u003c\/li\u003e\n\u003cli data-start=\"1240\" data-end=\"1375\"\u003e\n\u003cp data-start=\"1242\" data-end=\"1375\"\u003e\u003cstrong data-start=\"1242\" data-end=\"1271\"\u003eCaravan \u0026amp; Camper Log Book\u003c\/strong\u003e – a practical favourite for travellers to record campsites, trips, and kilometres across the country.\u003c\/p\u003e\n\u003c\/li\u003e\n\u003cli data-start=\"1376\" data-end=\"1545\"\u003e\n\u003cp data-start=\"1378\" data-end=\"1545\"\u003e\u003cstrong data-start=\"1378\" data-end=\"1402\"\u003eTravel-friendly gear\u003c\/strong\u003e – from Navigator Gear, Hema Maps and collapsible kettles to portable games and lightweight accessories, everything is chosen to make travelling easier.\u003c\/p\u003e\n\u003c\/li\u003e\n\u003c\/ul\u003e\n\u003ch3 data-start=\"1547\" data-end=\"1593\"\u003eAdventure-Ready for Families \u0026amp; Explorers\u003c\/h3\u003e\n\u003cp data-start=\"1594\" data-end=\"1914\"\u003eThis collection is designed for \u003cstrong data-start=\"1626\" data-end=\"1674\"\u003efamilies, grey nomads, and adventure seekers\u003c\/strong\u003e who want reliable gear for caravanning, camping, or overseas travel. Whether it’s keeping kids entertained, keeping your caravan organised, or documenting your journeys, you’ll find clever, practical products that make every trip better.\u003c\/p\u003e\n\u003ch3 data-start=\"1916\" data-end=\"1945\"\u003eProudly Australian!\u003c\/h3\u003e\n\u003cp data-start=\"1946\" data-end=\"2226\"\u003eWe’re a small family business based in \u003cstrong data-start=\"1985\" data-end=\"2007\"\u003eNumurkah, Victoria\u003c\/strong\u003e, and we’ve shipped to over 200,000 happy customers across Australia. When you shop with Adventure Awaits, you’re supporting locals who are passionate about travel, family adventures, and products that genuinely work.\u003c\/p\u003e\n\u003chr data-start=\"2228\" data-end=\"2233\"\u003e\n\u003ch2 data-start=\"2235\" data-end=\"2448\"\u003e✨ \u003cstrong data-start=\"2237\" data-end=\"2446\"\u003eStart exploring our Travel Gifts \u0026amp; Gear Collection today - featuring the Map of Australia Sticker, Pegless Clothesline, Kids Travel Journal and Caravan Camper Log Book - all shipped fast from Adventure Awaits.\u003c\/strong\u003e\n\u003c\/h2\u003e","image":{"created_at":"2020-05-30T23:10:49+10:00","alt":null,"width":1440,"height":1440,"src":"\/\/www.adventureawaits.com.au\/cdn\/shop\/collections\/perth_win_6.jpg?v=1756881881"}},{"id":282100433088,"handle":"teacher-gift-ideas","updated_at":"2026-06-25T15:45:01+10:00","published_at":"2021-10-02T11:21:16+10:00","sort_order":"created-desc","template_suffix":"","published_scope":"global","title":"Unique \u0026 Practical Teacher Gift Ideas for Every Occasion","body_html":"\u003cp data-start=\"2156\" data-end=\"2403\"\u003eSay thanks to the amazing teachers in your life with our hand-picked range of thoughtful gift ideas. Whether it’s for end of year, Christmas, or just because, we’ve got practical, heartfelt and eco-friendly options they'll actually use and love.\u003c\/p\u003e\n\u003cp data-start=\"2410\" data-end=\"2569\"\u003eExplore bestselling favourites from Aussie brands, including journals, keyrings, reusable coffee cups, and classroom-ready goodies that make giving feel great.\u003c\/p\u003e\n\u003cp\u003eCheck out what made the \u003ca href=\"https:\/\/www.adventureawaits.com.au\/blogs\/news\/5-best-teacher-gifts-voted-by-teachers\" rel=\"noopener noreferrer\" target=\"_blank\"\u003eTOP 5 here...\u003c\/a\u003e\u003c\/p\u003e\n\u003cp\u003e\u003ca href=\"https:\/\/www.adventureawaits.com.au\/blogs\/news\/5-best-teacher-gifts-voted-by-teachers\" rel=\"noopener noreferrer\" target=\"_blank\"\u003e\u003cimg alt=\"\" src=\"https:\/\/cdn.shopify.com\/s\/files\/1\/0401\/3775\/2731\/files\/teacher_blog_480x480.jpg?v=1633250653\"\u003e\u003c\/a\u003e\u003c\/p\u003e","image":{"created_at":"2024-08-27T20:02:29+10:00","alt":null,"width":2048,"height":2048,"src":"\/\/www.adventureawaits.com.au\/cdn\/shop\/collections\/fox_and_leo.png?v=1724752950"}}]
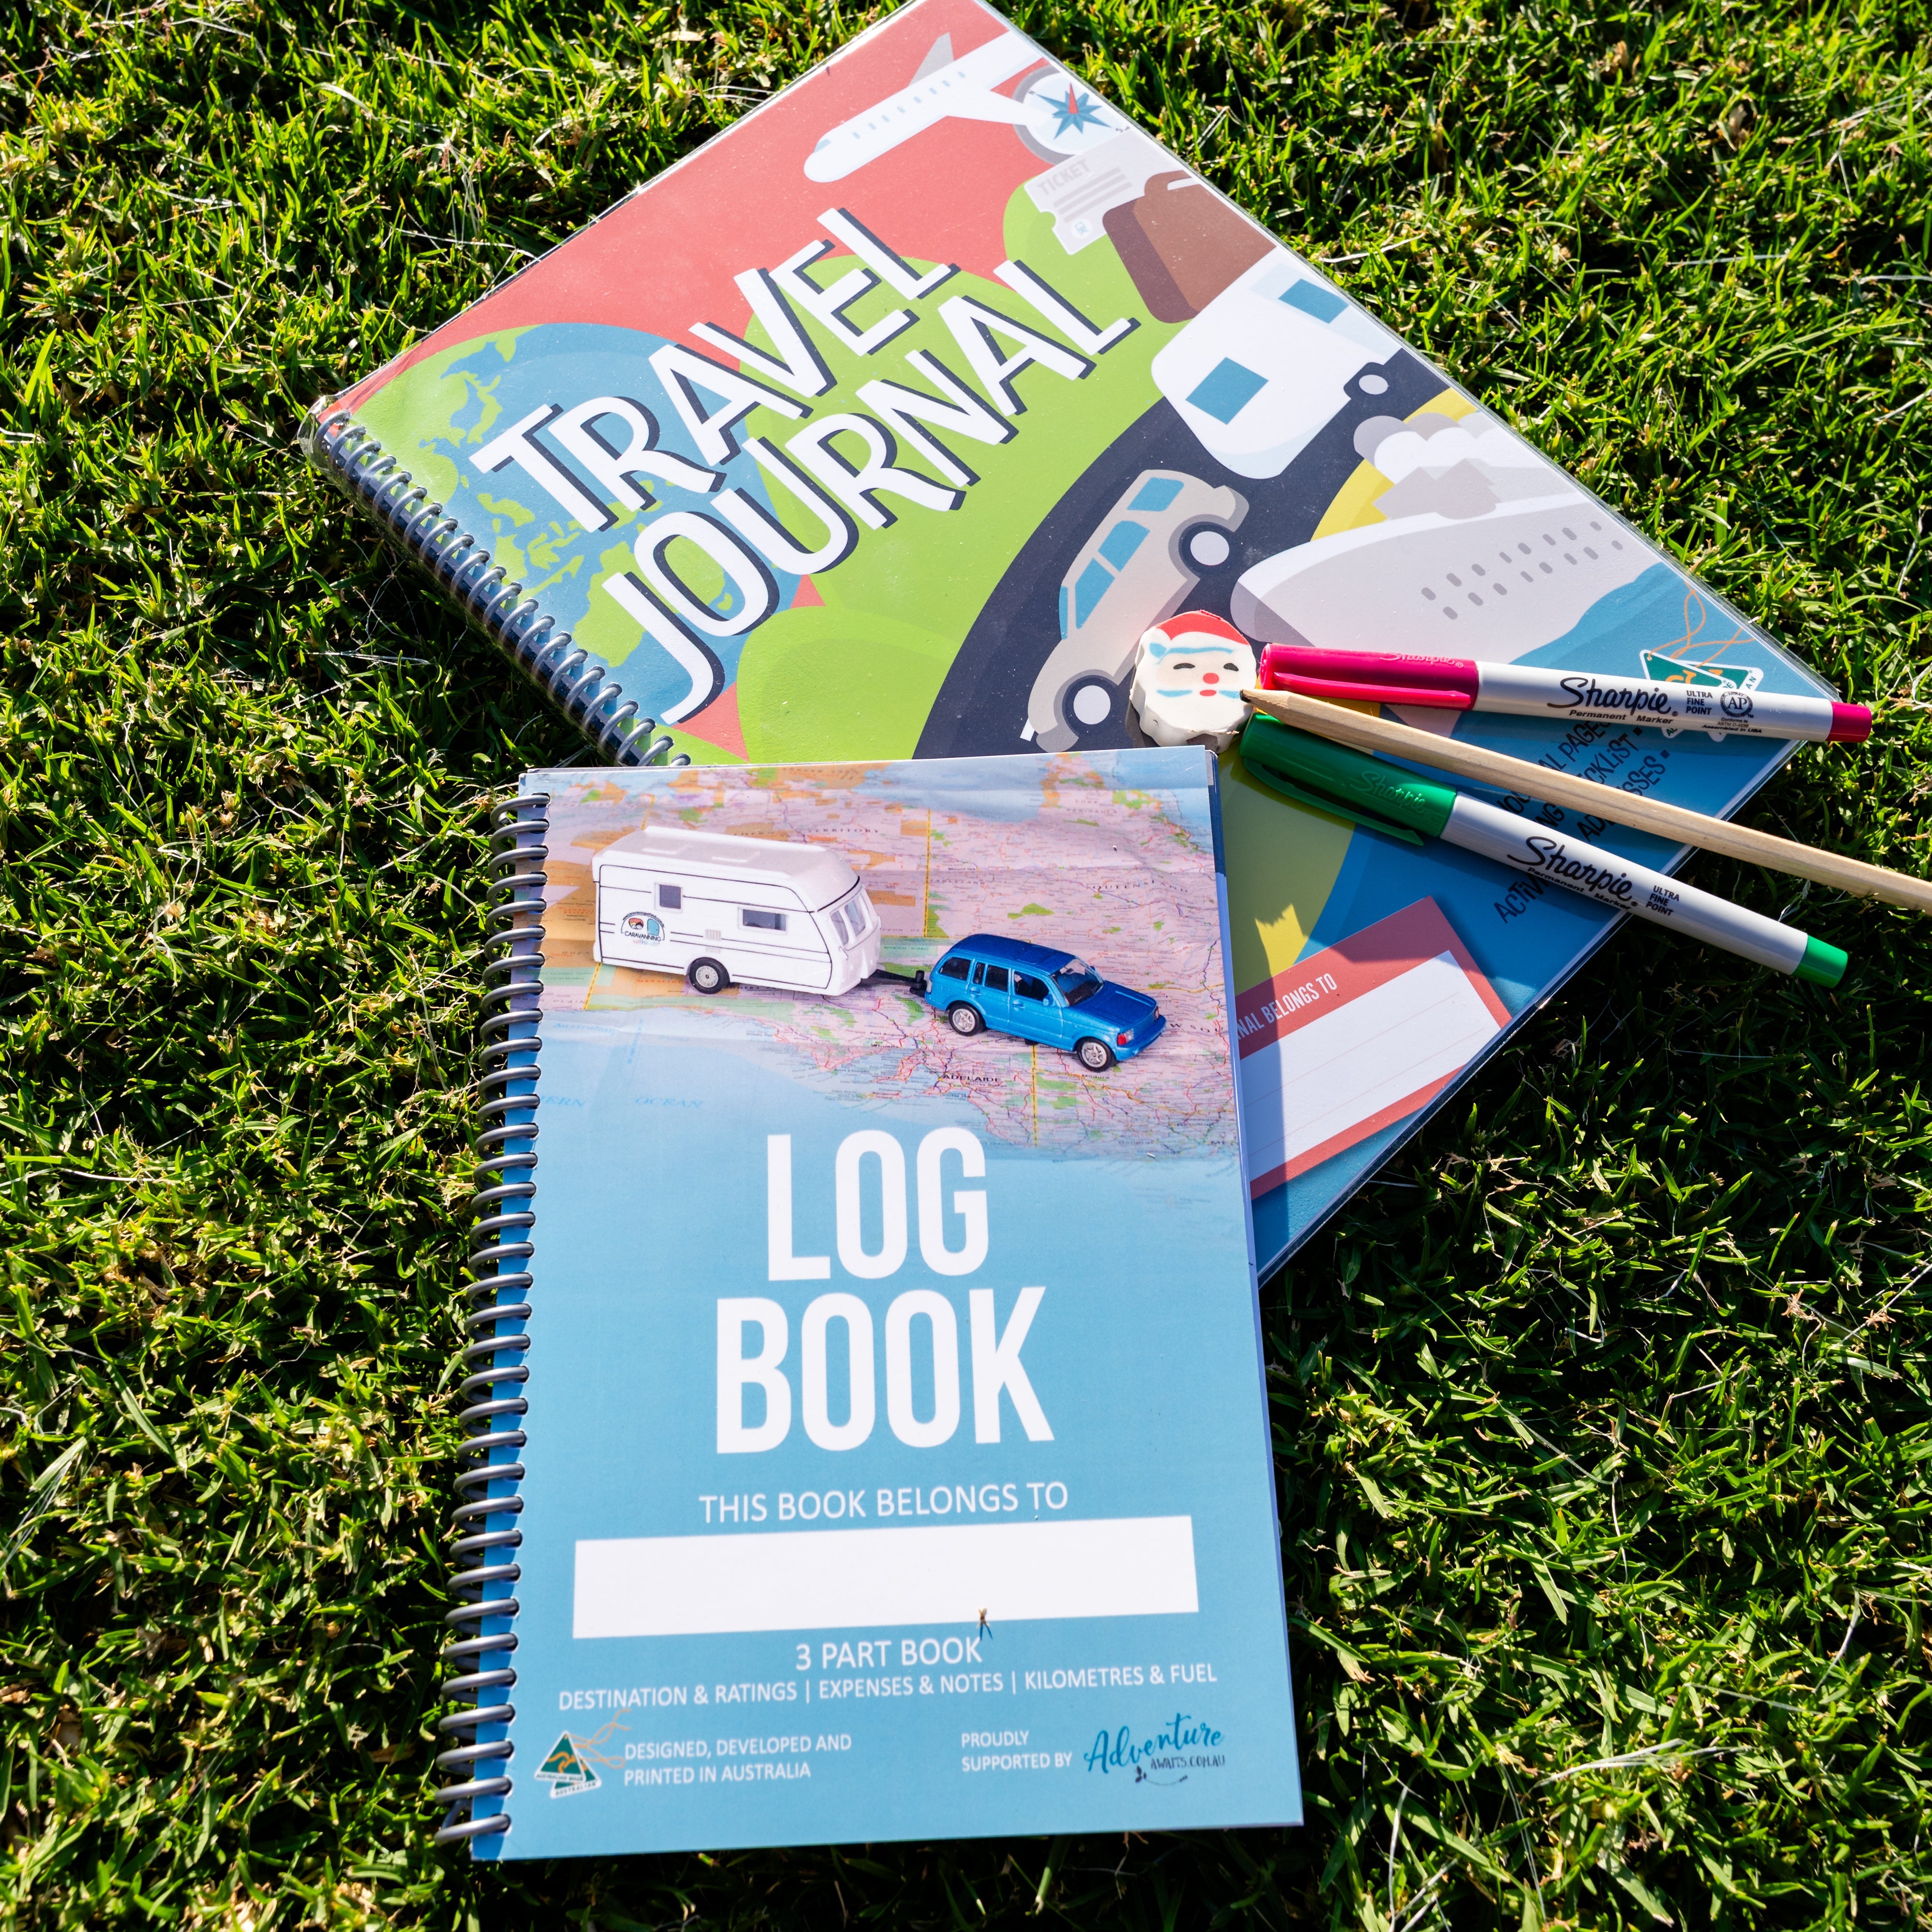
Hema Maps | Red Centre Alice Springs to Uluru Iconic Map
A waterproof regional map of Australia’s iconic Red Centre, covering Alice Springs, Uluru, Kata Tjuta and surrounding national parks.
No reviews
Price
$19.95
In stock and ready for shipping
Over 150,000 Happy Customers
We really do have "Something for Everyone"
Australian Owned & Operated
THANK YOU for choosing us x
We Ship EVERY DAY!
Direct to you from our store in Numurkah Victoria! FREE Shipping for orders over $99...
Product Info (That's Actually Helpful)...
Discover the Heart of Australia...
There’s nowhere quite like the Red Centre - vast, rugged, spiritual and unmistakably Australian. This Red Centre Map (7th Edition) from Hema Maps is the perfect companion for exploring one of the most breathtaking landscapes in the country.
Designed for travellers who love to go beyond the beaten track, this detailed regional map helps you navigate everything from famous landmarks to remote outback roads with confidence.
🗺️ What This Map Covers
✔ Alice Springs and surrounds ✔ Uluru–Kata Tjuta National Park ✔ West MacDonnell Ranges ✔ Watarrka (Kings Canyon) National Park ✔ Touring routes, sealed and unsealed roads ✔ 4WD tracks and GPS-surveyed routes
📍 Built for Outback Travel
This map goes beyond roads and towns, including essential planning information for safe and informed travel in remote Australia:
• Fuel stops & service locations • Camping areas • Historic sites & points of interest • Detailed inset maps • Permit information & useful contacts • Cultural and historical context for key destinations
Printed on durable, waterproof paper, it’s made to withstand dust, heat, and life on the road.
🚐 Why We Love This Map
Whether you’re tackling your first Red Centre adventure or returning for another lap, this map gives you the confidence to explore responsibly - even when there’s no mobile reception for hundreds of kilometres.
Pair this map with a Great Desert Tracks or Northern Territory State Map for extended outback journeys and multi-day remote travel planning.
Shipping Info (a.k.a. How It Gets to You)
We pack your orders with care and ship every weekday from our little store in Numurkah, Victoria...
Most orders $9.95 · Exact cost shown at checkout - Shipping from $3.95 (letters) · From $9.95 (small parcels) · $9.95–$22 (bulky items)
We use our local Australia Post Office for all orders. We are in regional Victoria, 2 - 7 business days for VIC, NSW, SA, TAS, ACT - parcels can take a little longer to get to Qld, NT & WA - please allow 4 - 10 business days for these states.
Shipping Fees will be added at checkout.
Most parcels are on their way within 24 hours via Australia Post - need tracking? Just let us know...
Is this on PRE ORDER? There will be a date in the description on when this will arrive instore. Your order will all be posted together when your PRE ORDER arrives and an email will be sent to let you know...
Need it fast? Just give us a shout - we’re real people and always happy to help.
Choosing a selection results in a full page refresh.
PayPal Pay Later Messaging
Step 1: Choose message placement
Click the button below and then hover over your page to select a placement.
Step 2: Paste and save
You have copied the placement for the Product Page.
Go back to the App Embeds section, and in the Paypal Advanced Settings, paste the copied value into the
Product Page field and click the 'Save' button in the top right corner.
I bought it as a glass holder for rinsing the mouth after brushing the teeth. I secured it close to the bath sink. Very useful indeed. No need to drill holes into the tiller wall. I had a suction one before, but it often would detach from the tiles. Especially when very hot weather outside.
It was much smaller than i thought it would be, so a little disappointed as it was a gift for friends doing lots of travelling around Australia . It will be hard for tgem to mark all the pkaces they have been